I made an activity board for my niece for Christmas. She loved it!
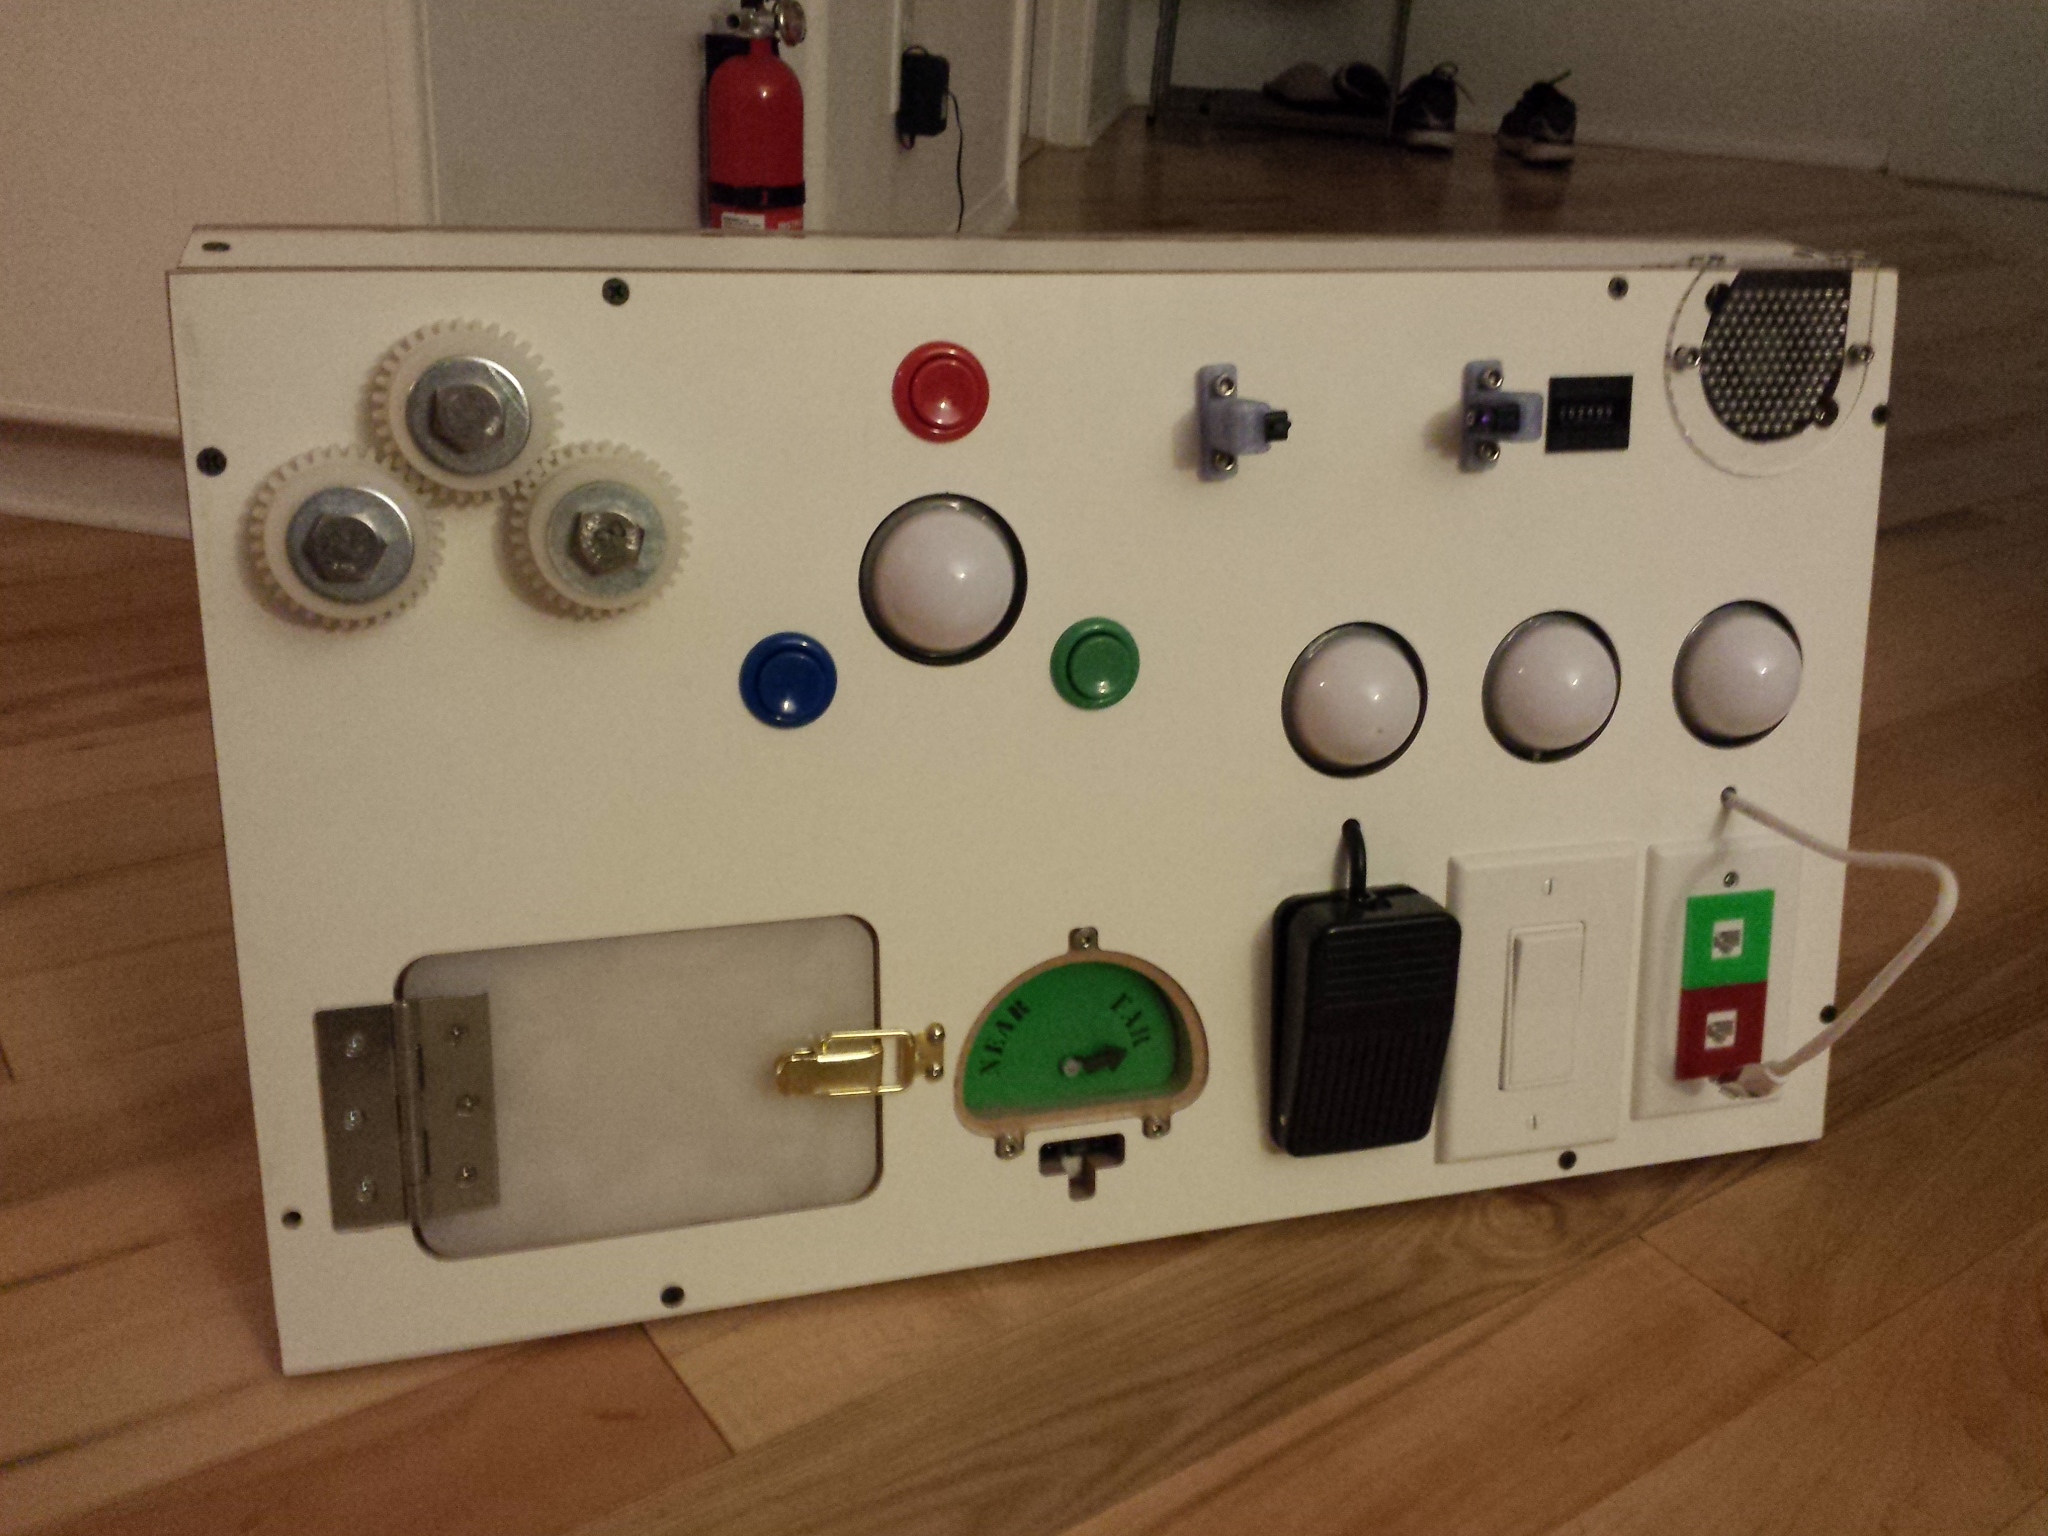
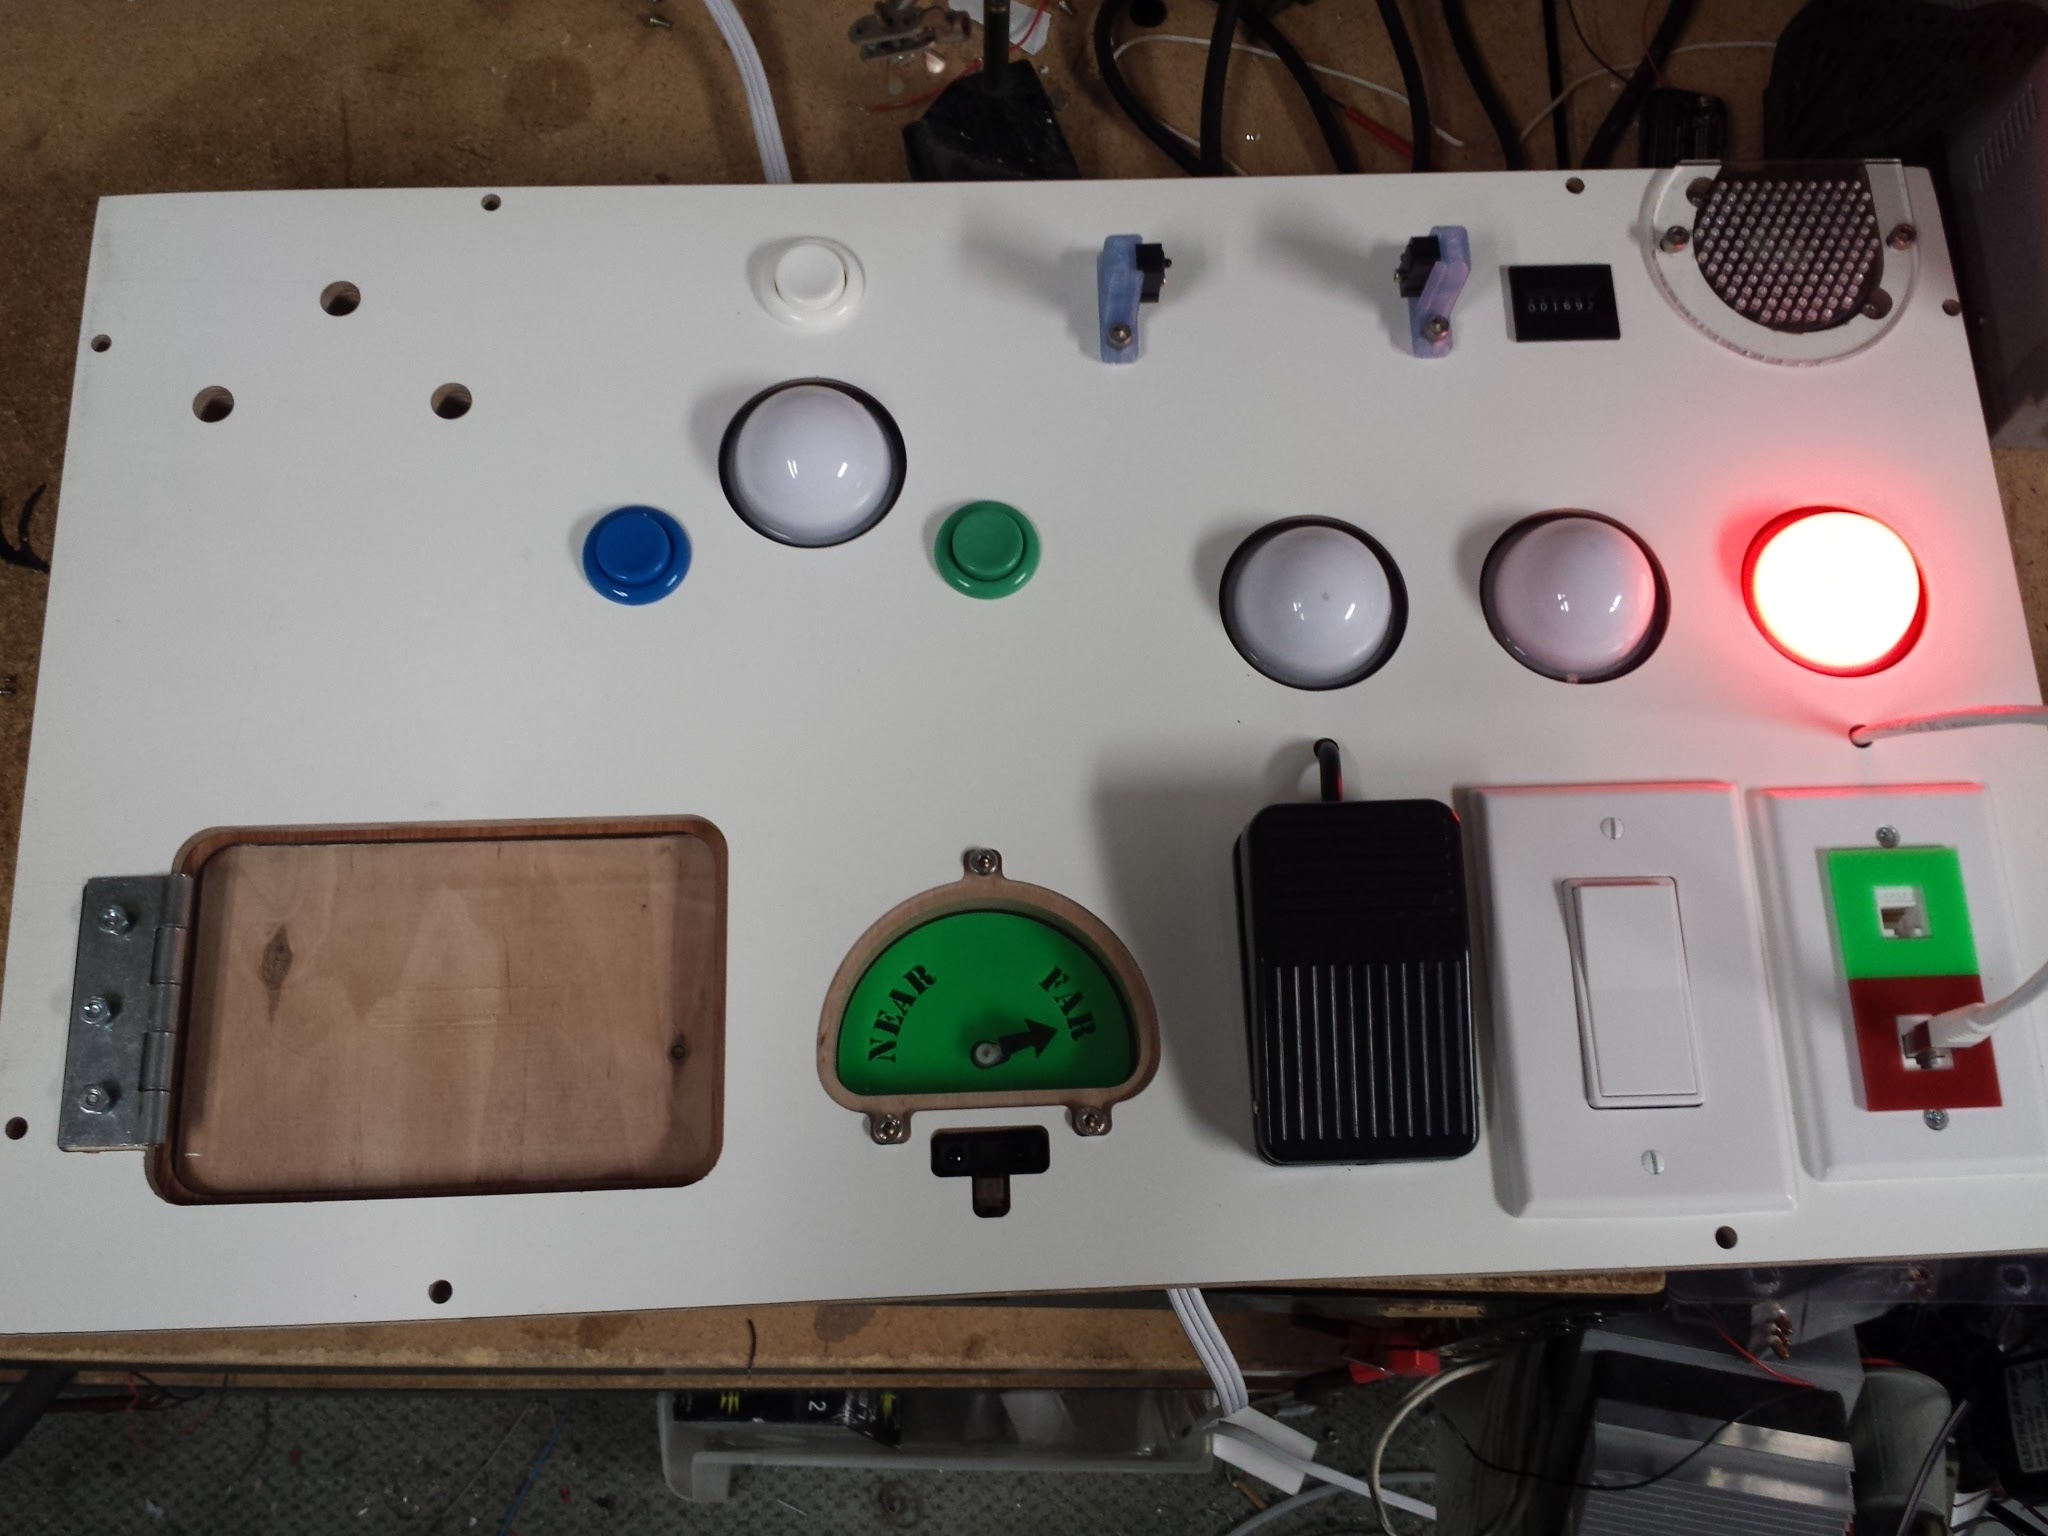
Final product:
Started out last week with a goal of using stuff I had laying around the house to make an activity board for my 22 month old niece.
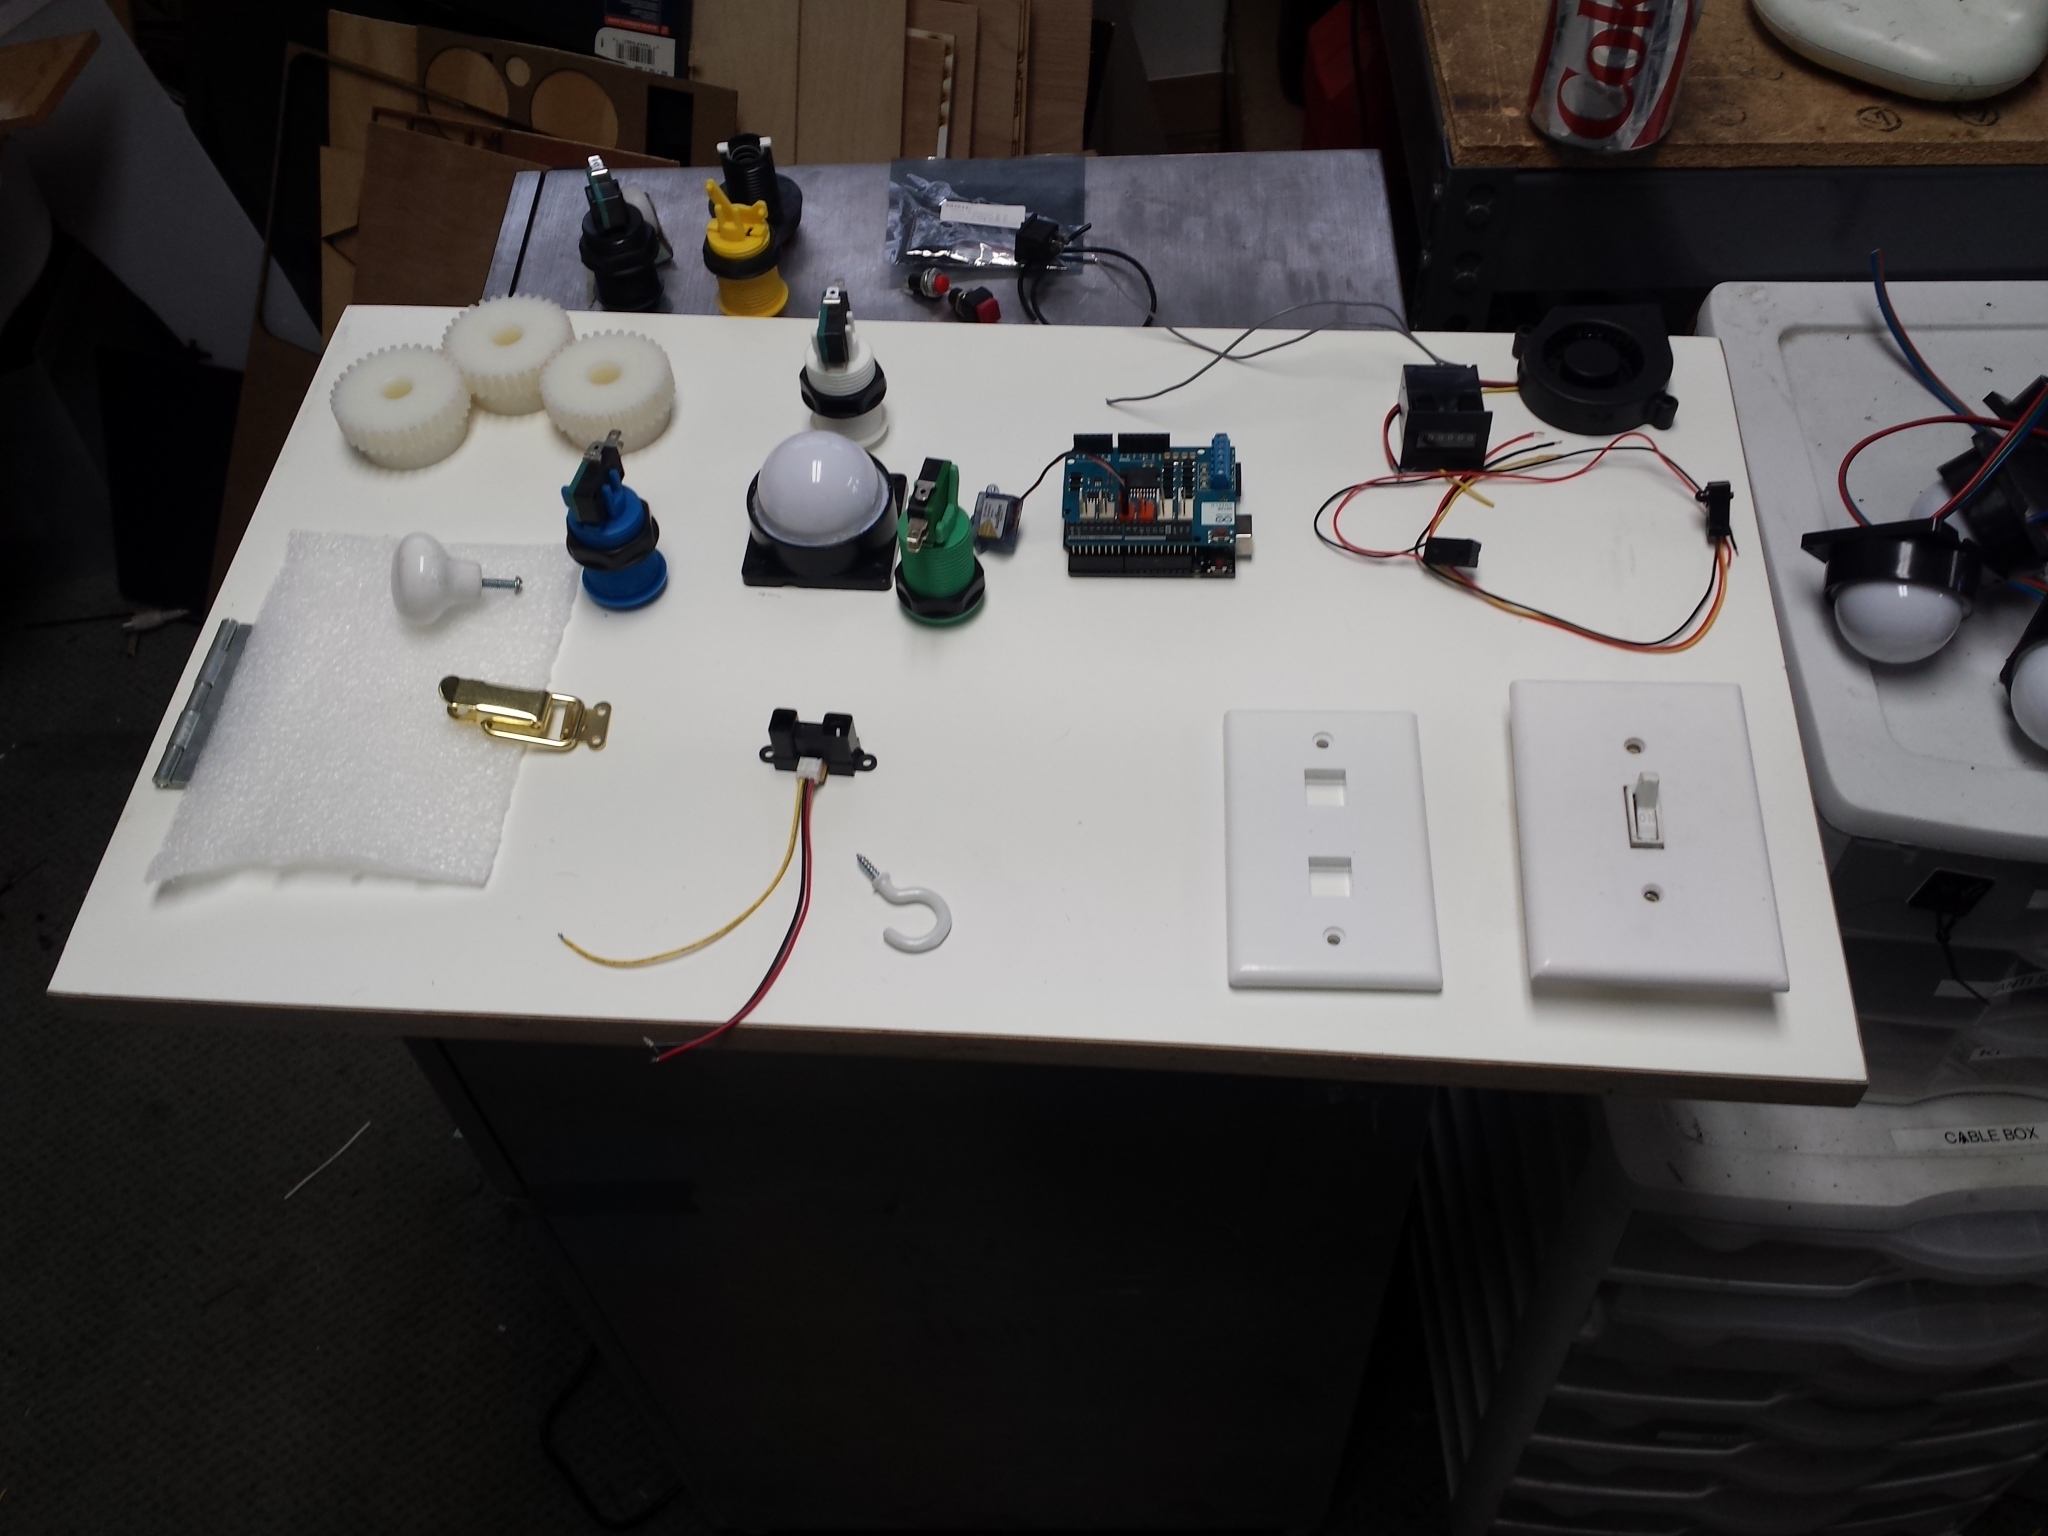
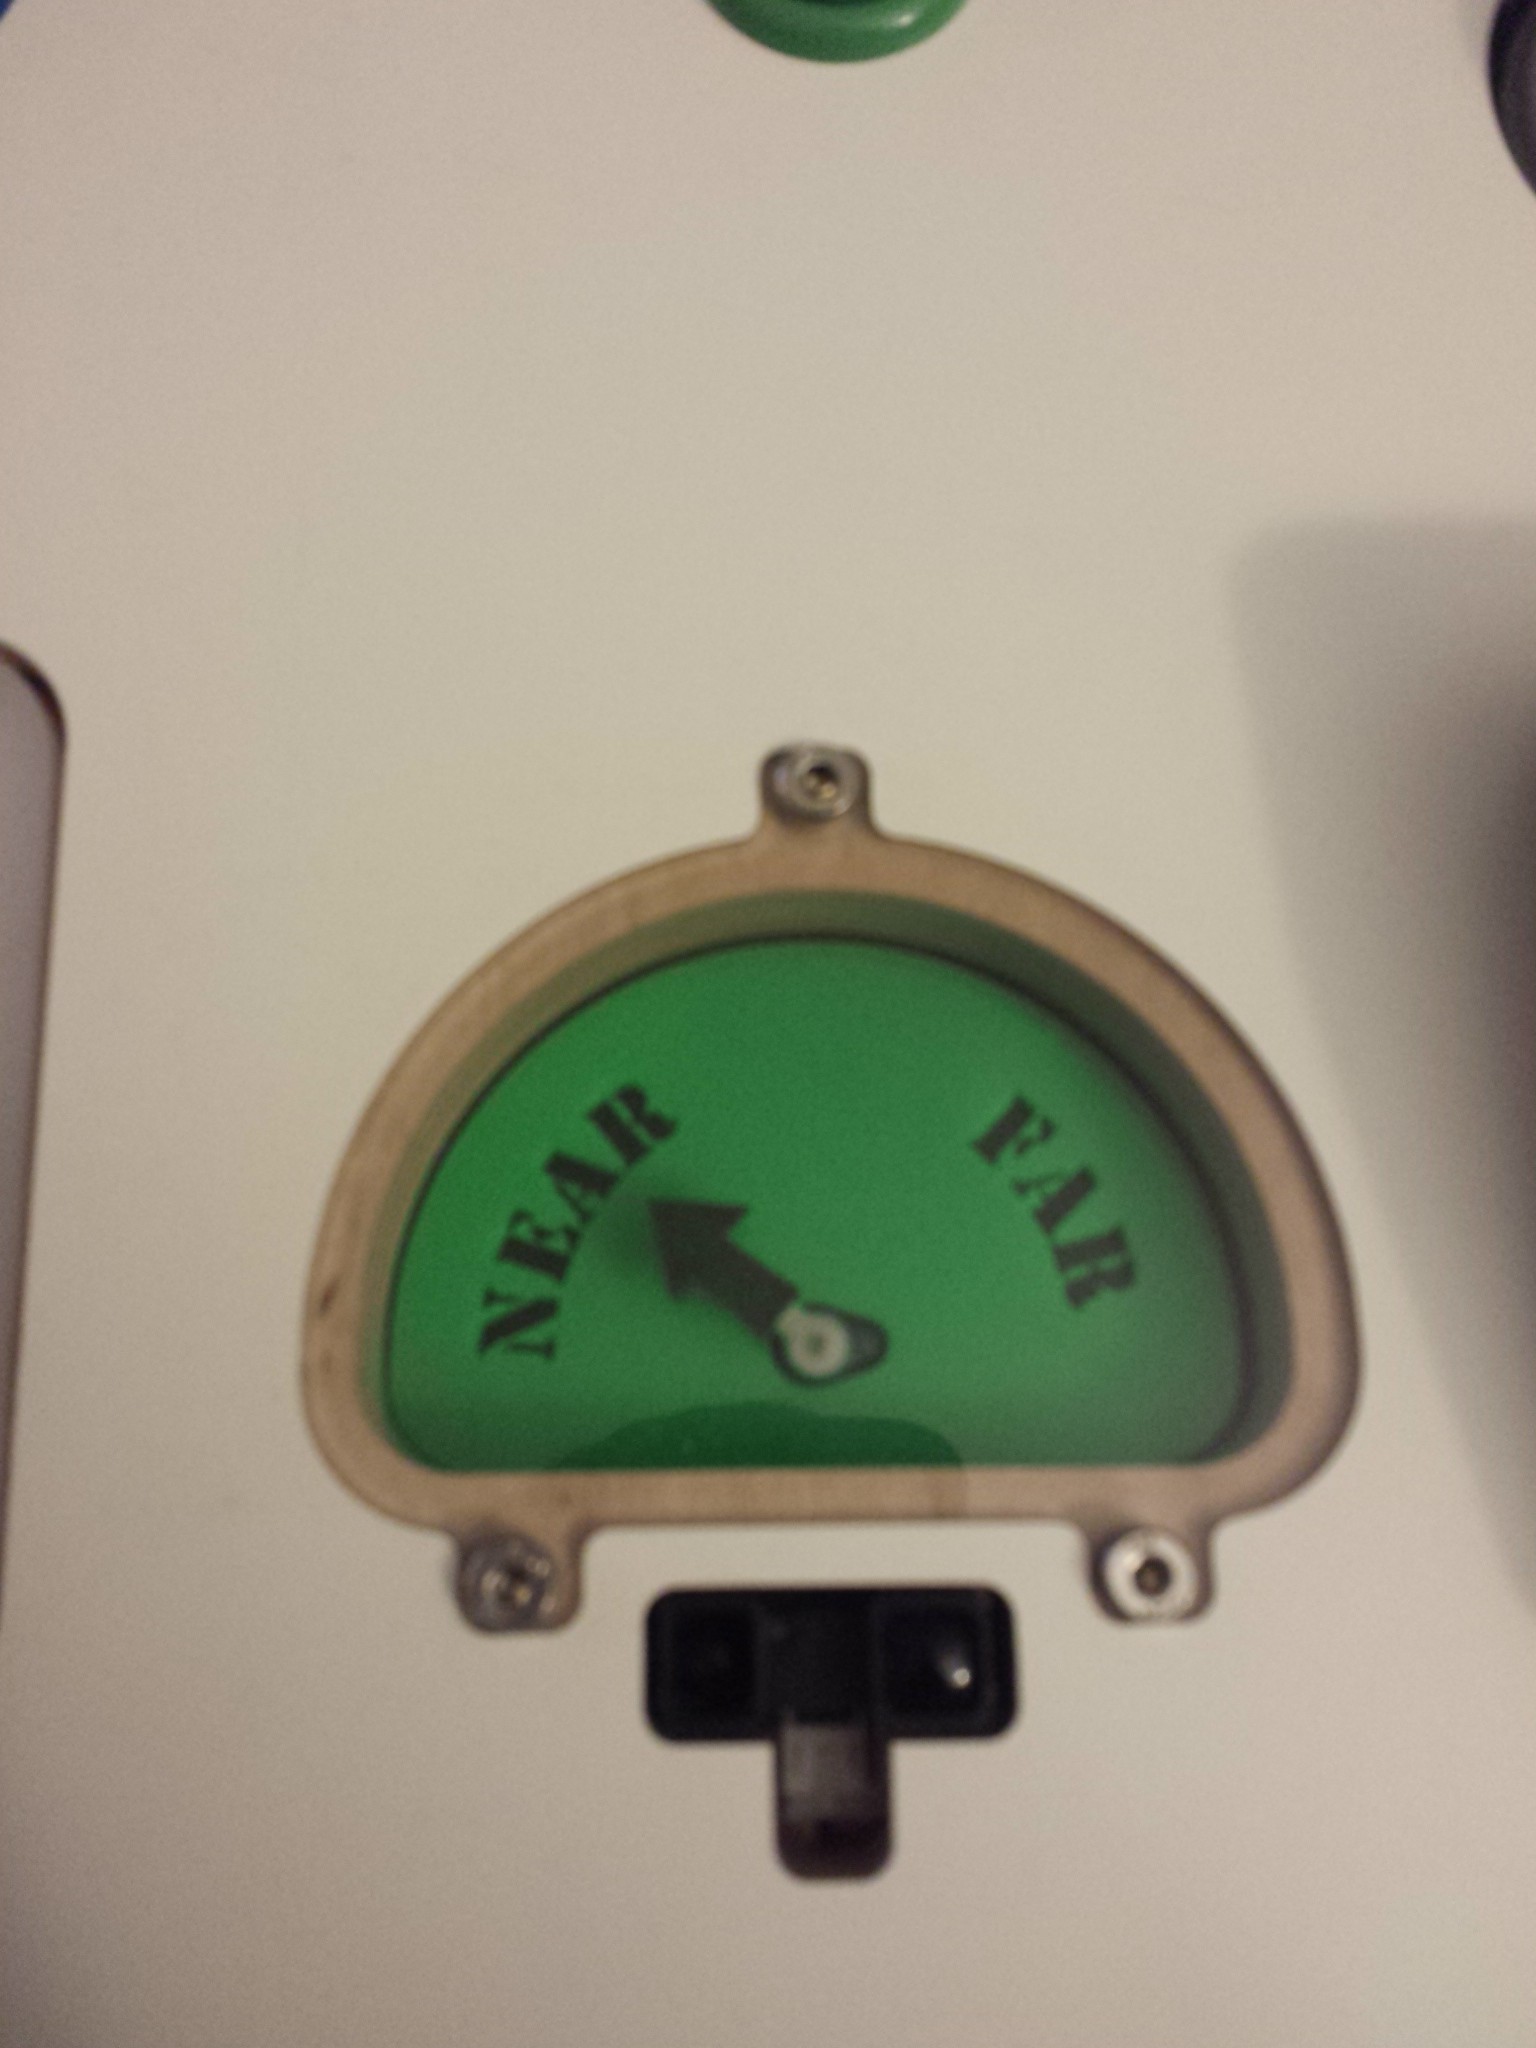
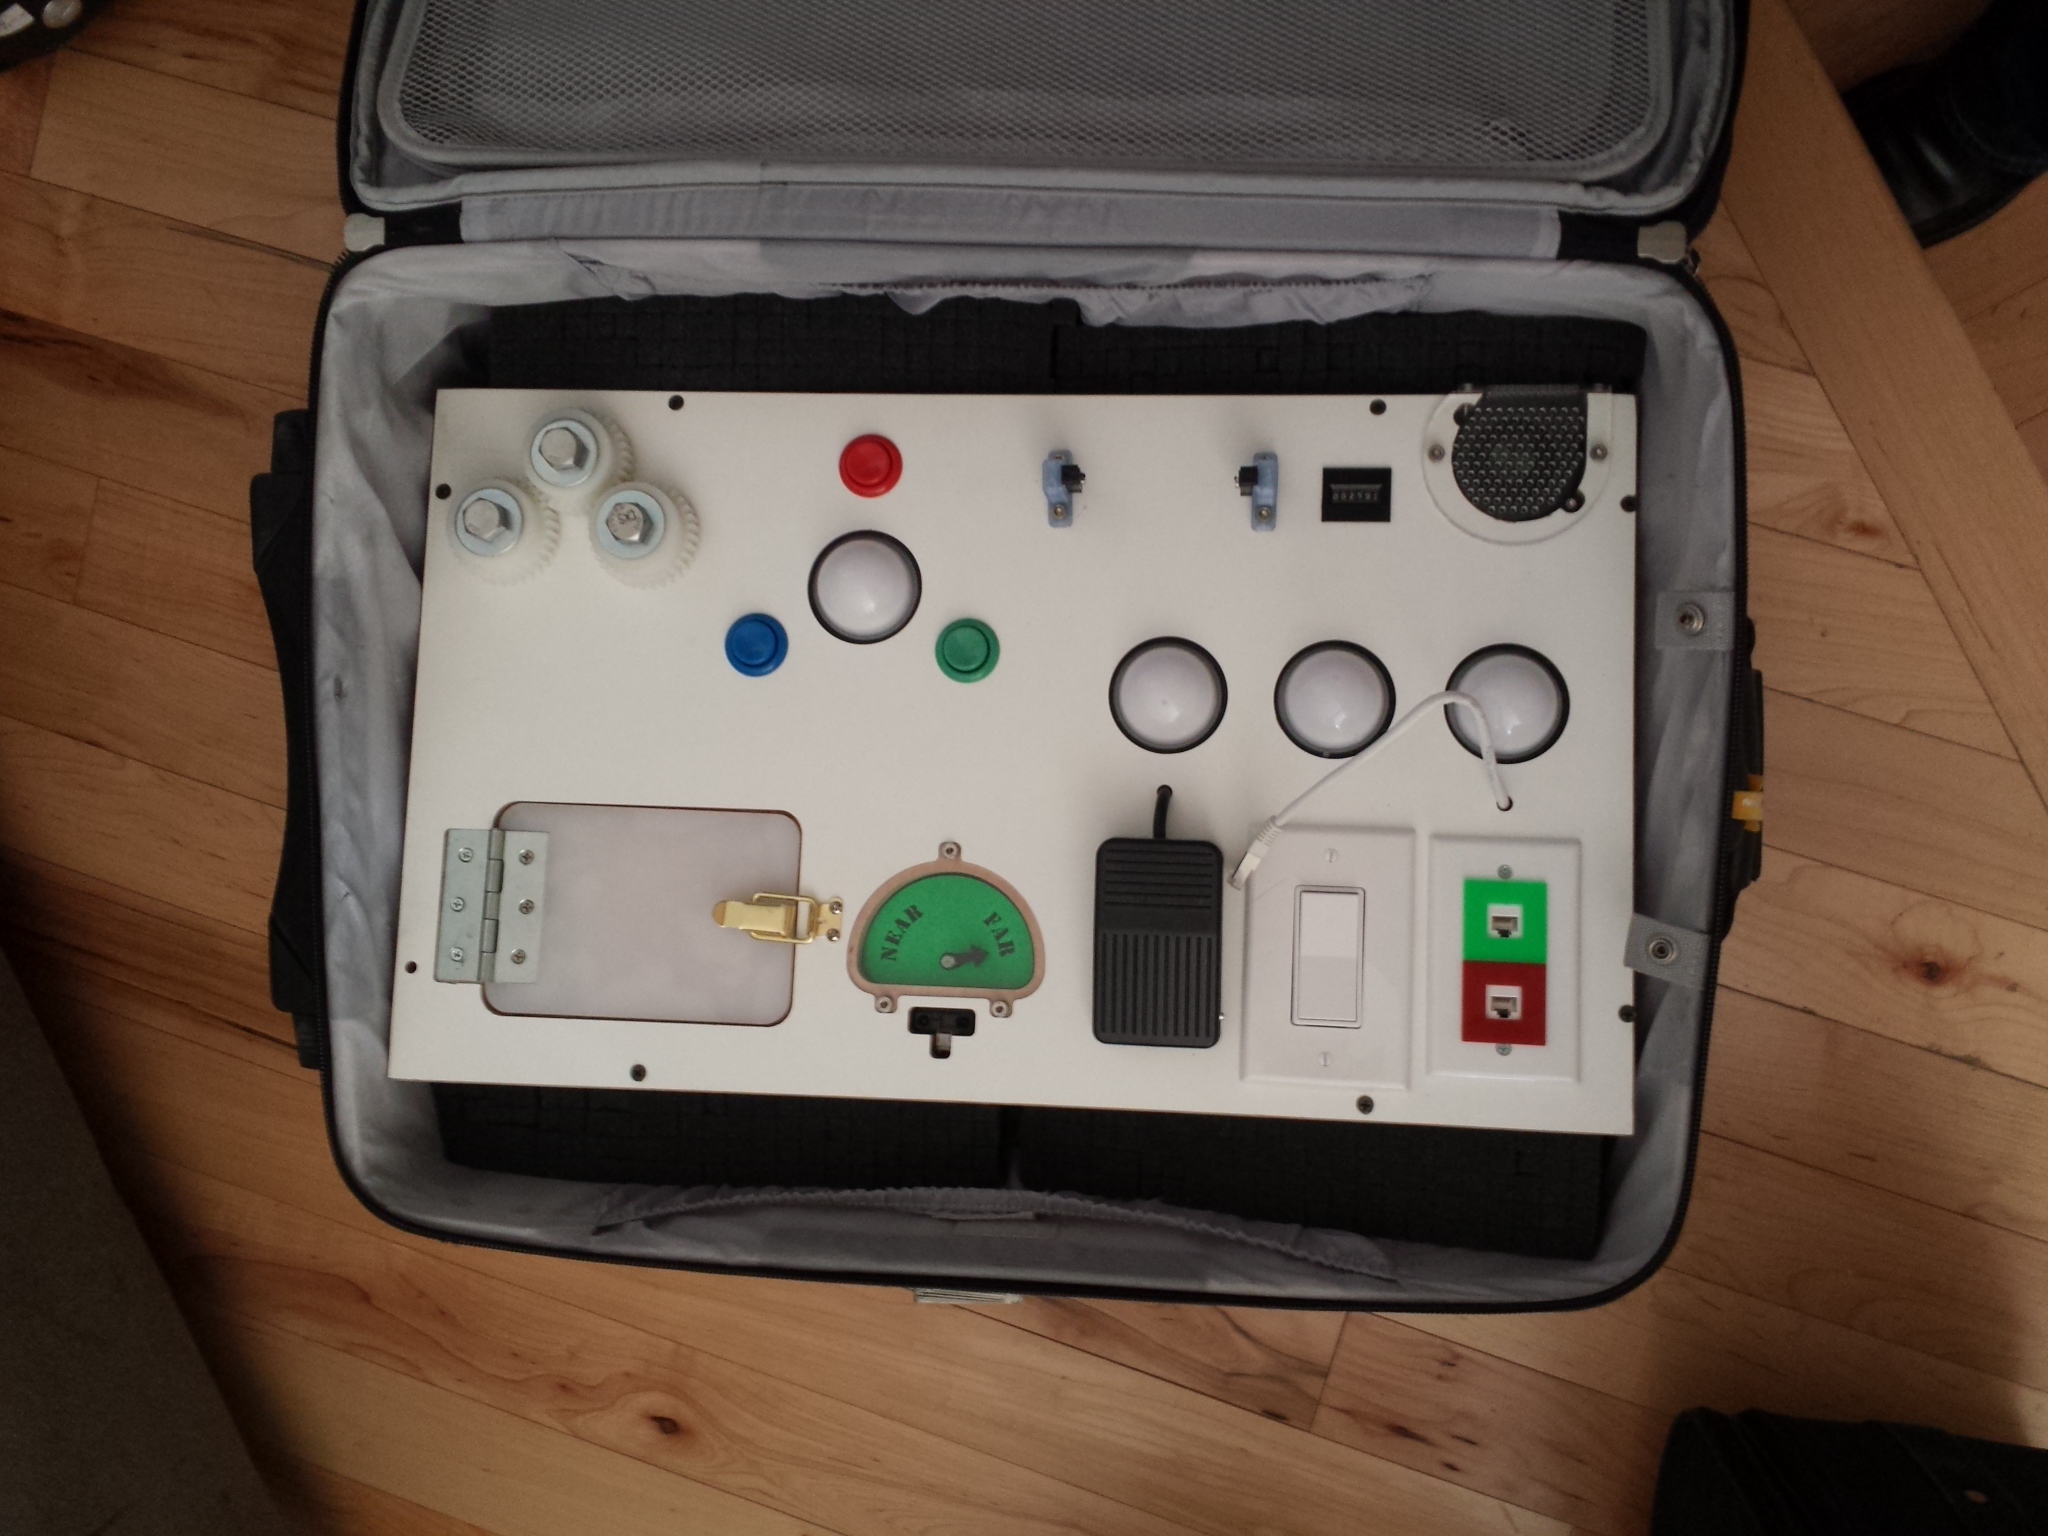
Found a few gears, a Sharp distance sensor, a micro servo, some light switches, an Ethernet wall plug, some LED lights, a counter, a fan, some buttons (from the musical chairs), and an extra break beam sensor from my cat wheel. I figured I could make something like my grandfather made for us when we were kids with locks and hinges but updated a bit with an Arduino.
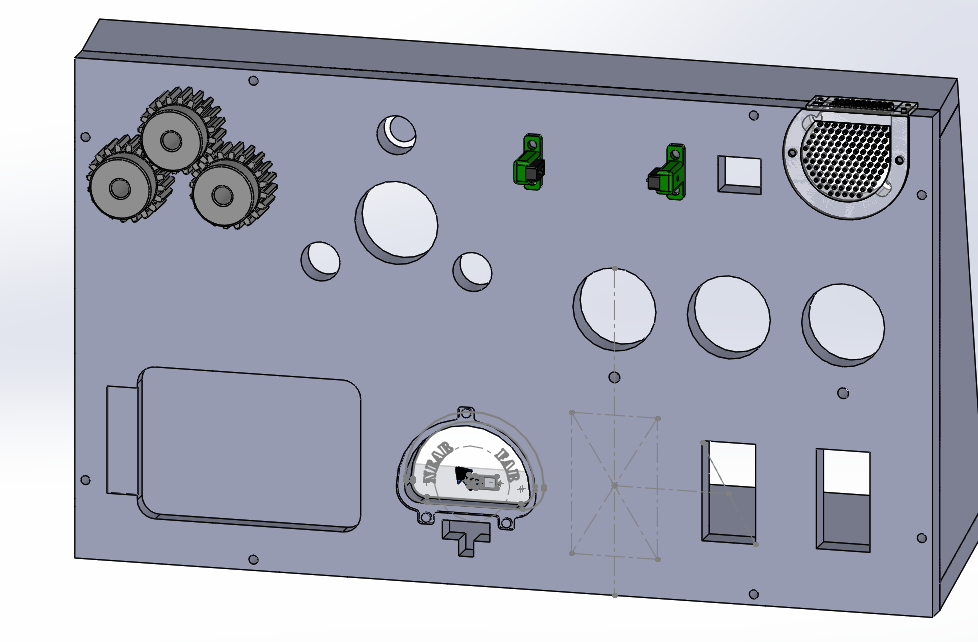
I drew something up in SolidWorks then started cutting an old shelf I had on the CNC ShopBot at my local Makerspace, THANKS CRASHSPACE!
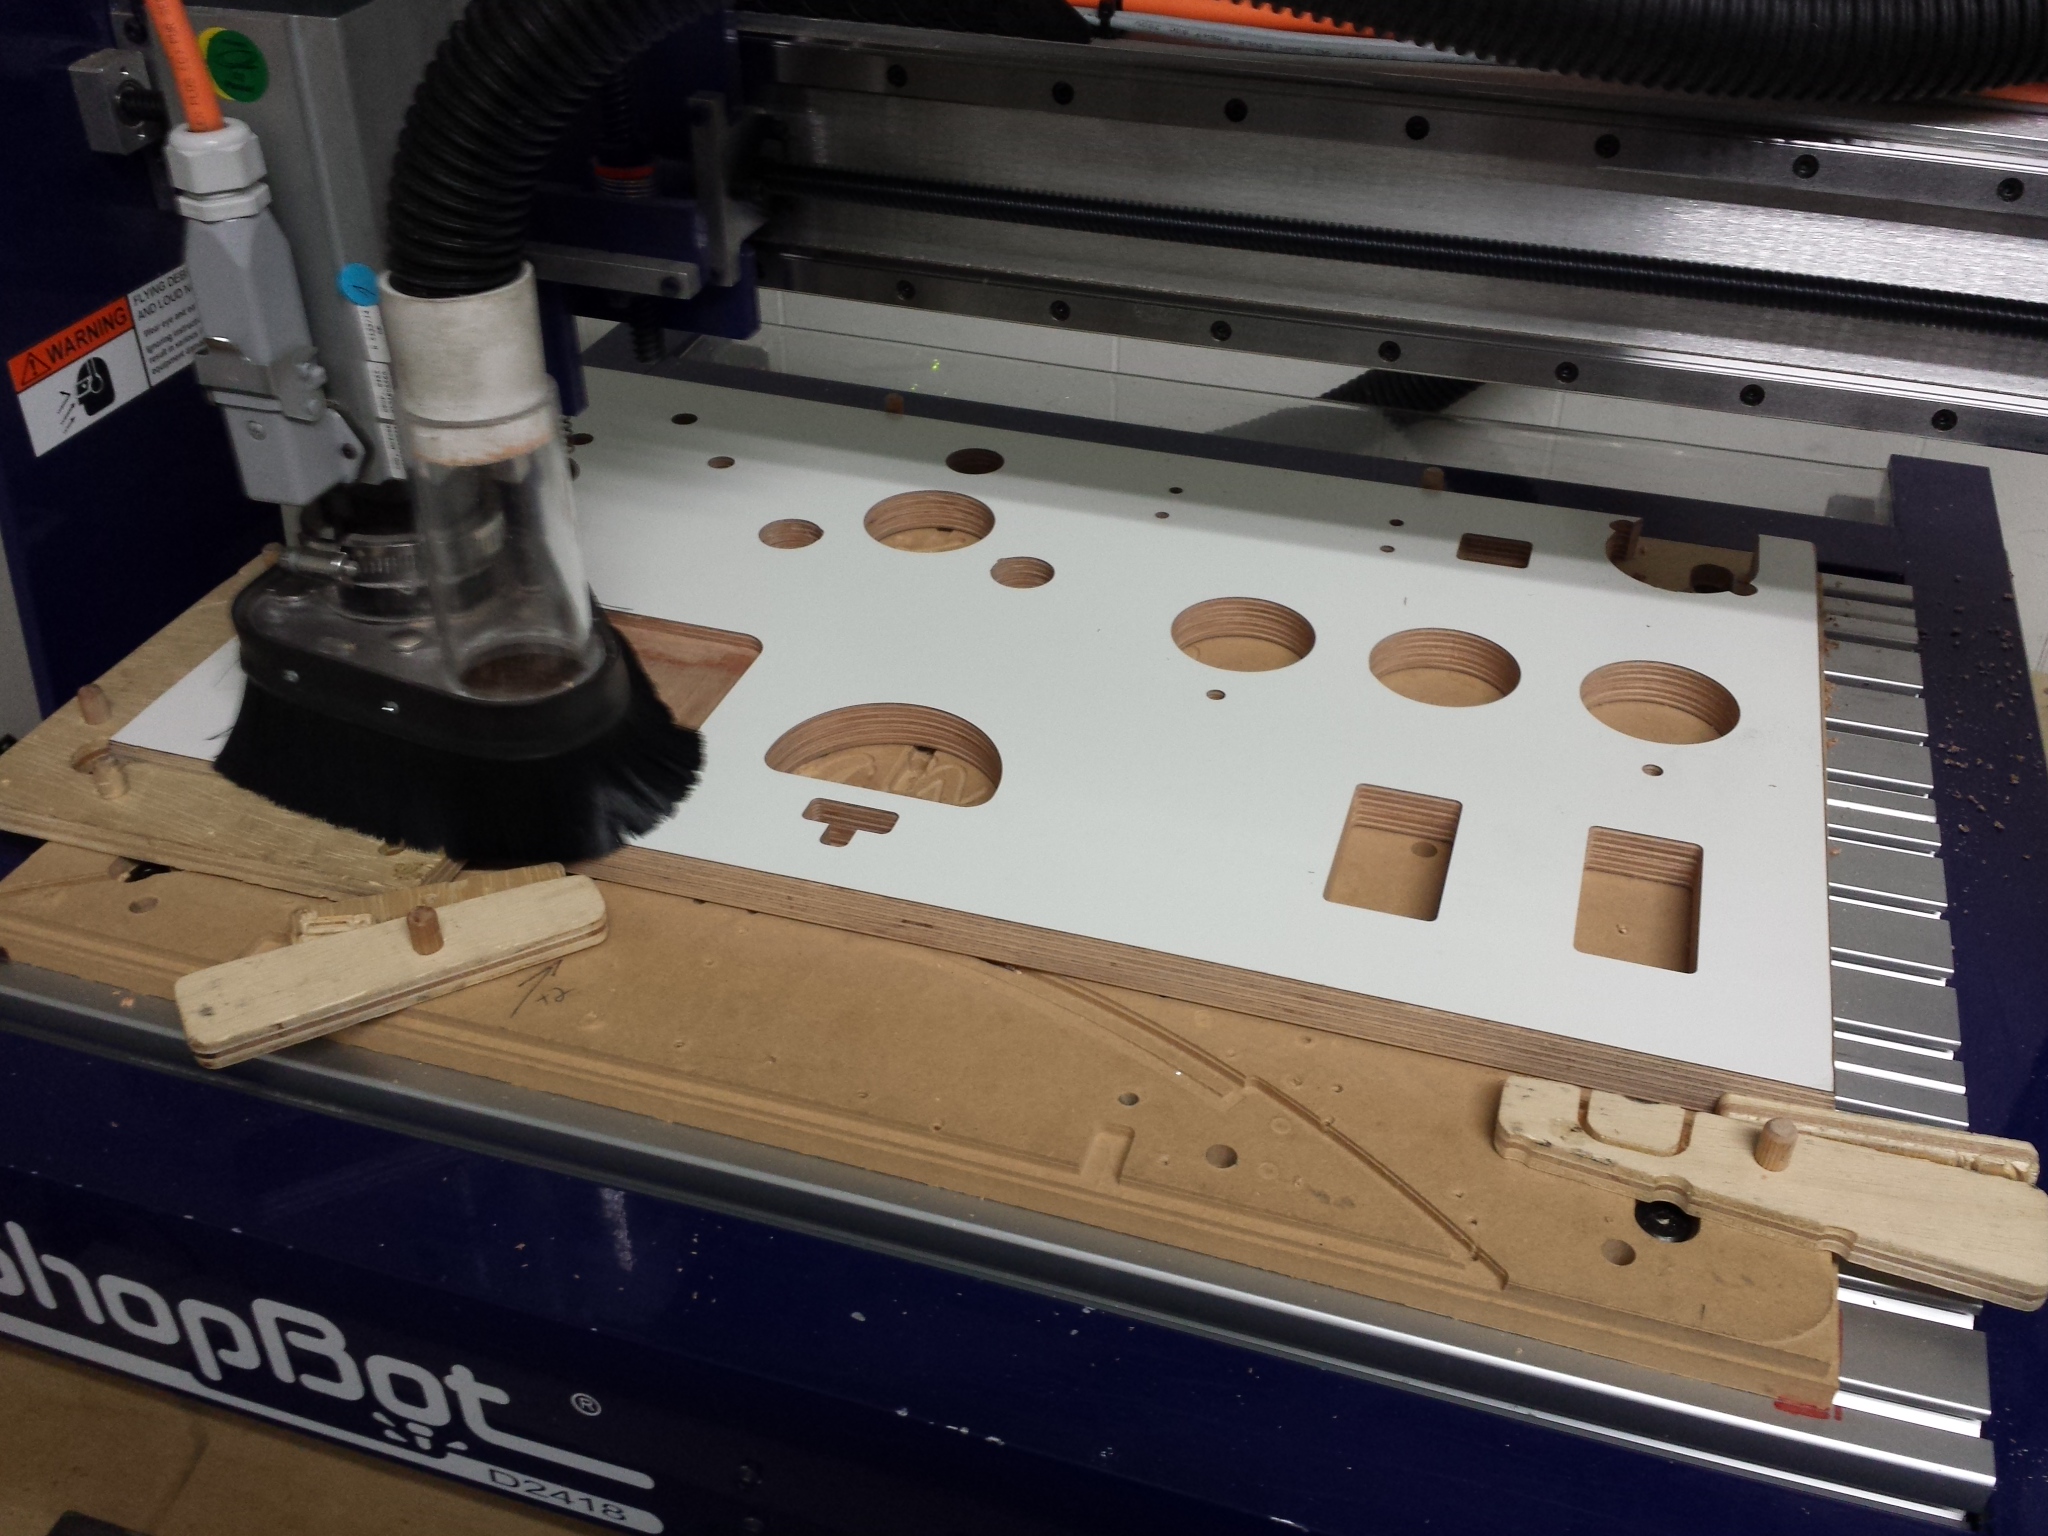
First round of cuts on the shopbot.
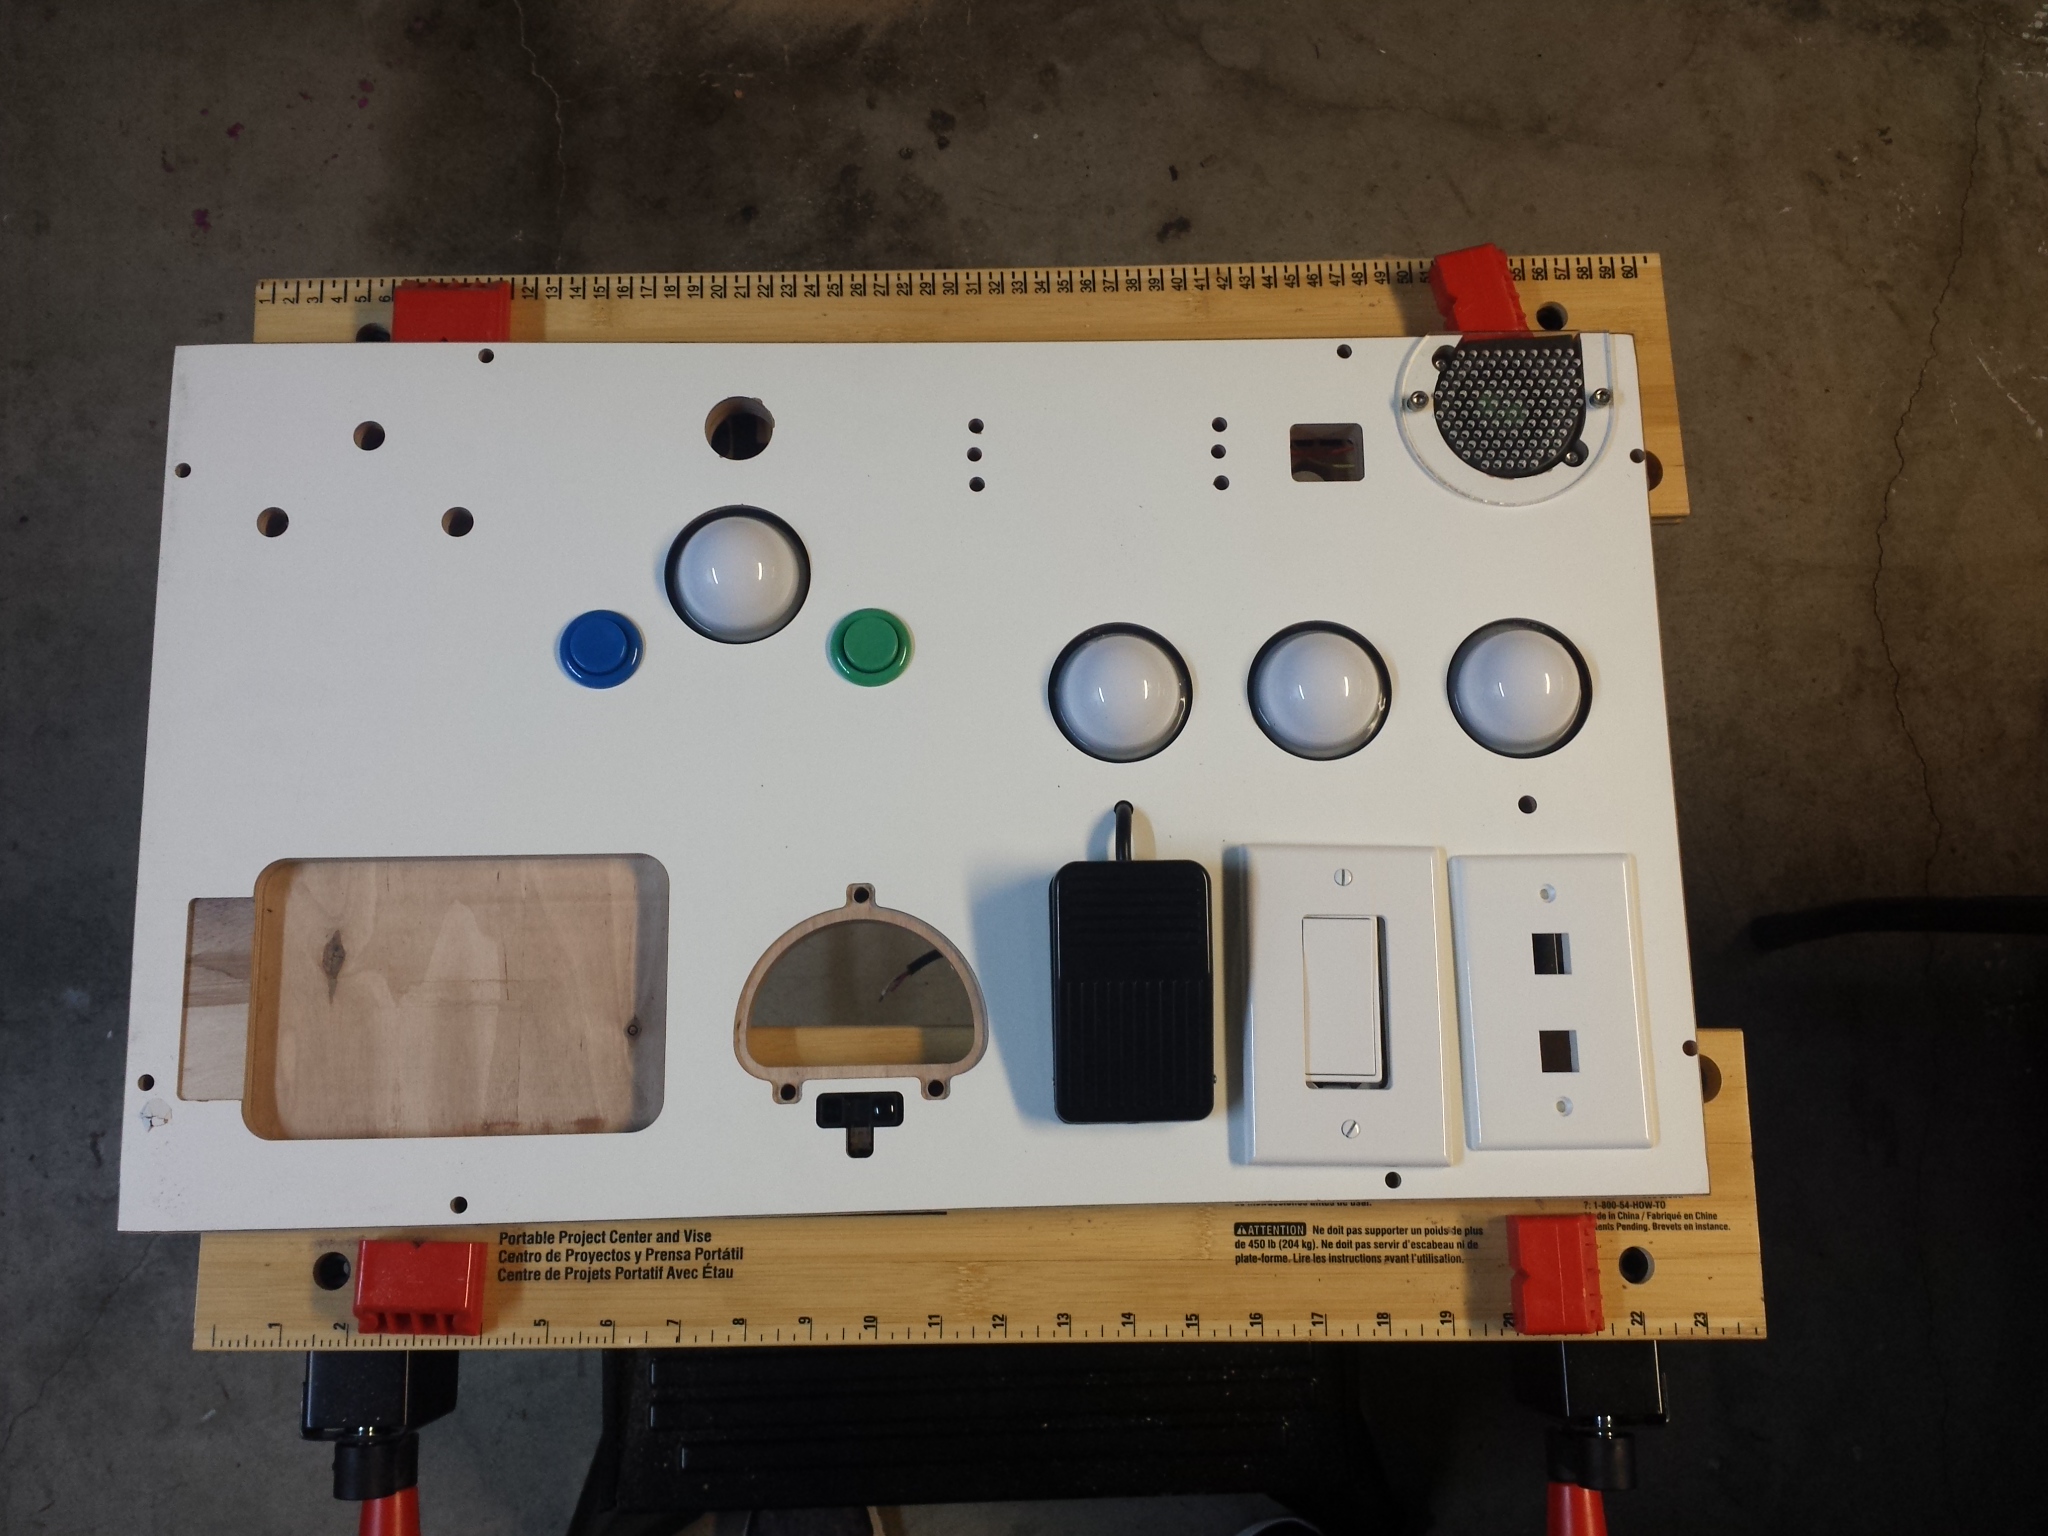
Things fit pretty well. I forgot a couple holes for mounting the box, the break beam sensor wires, and the recessed area for the Near Far sensor’s laser cut acrylic protection.
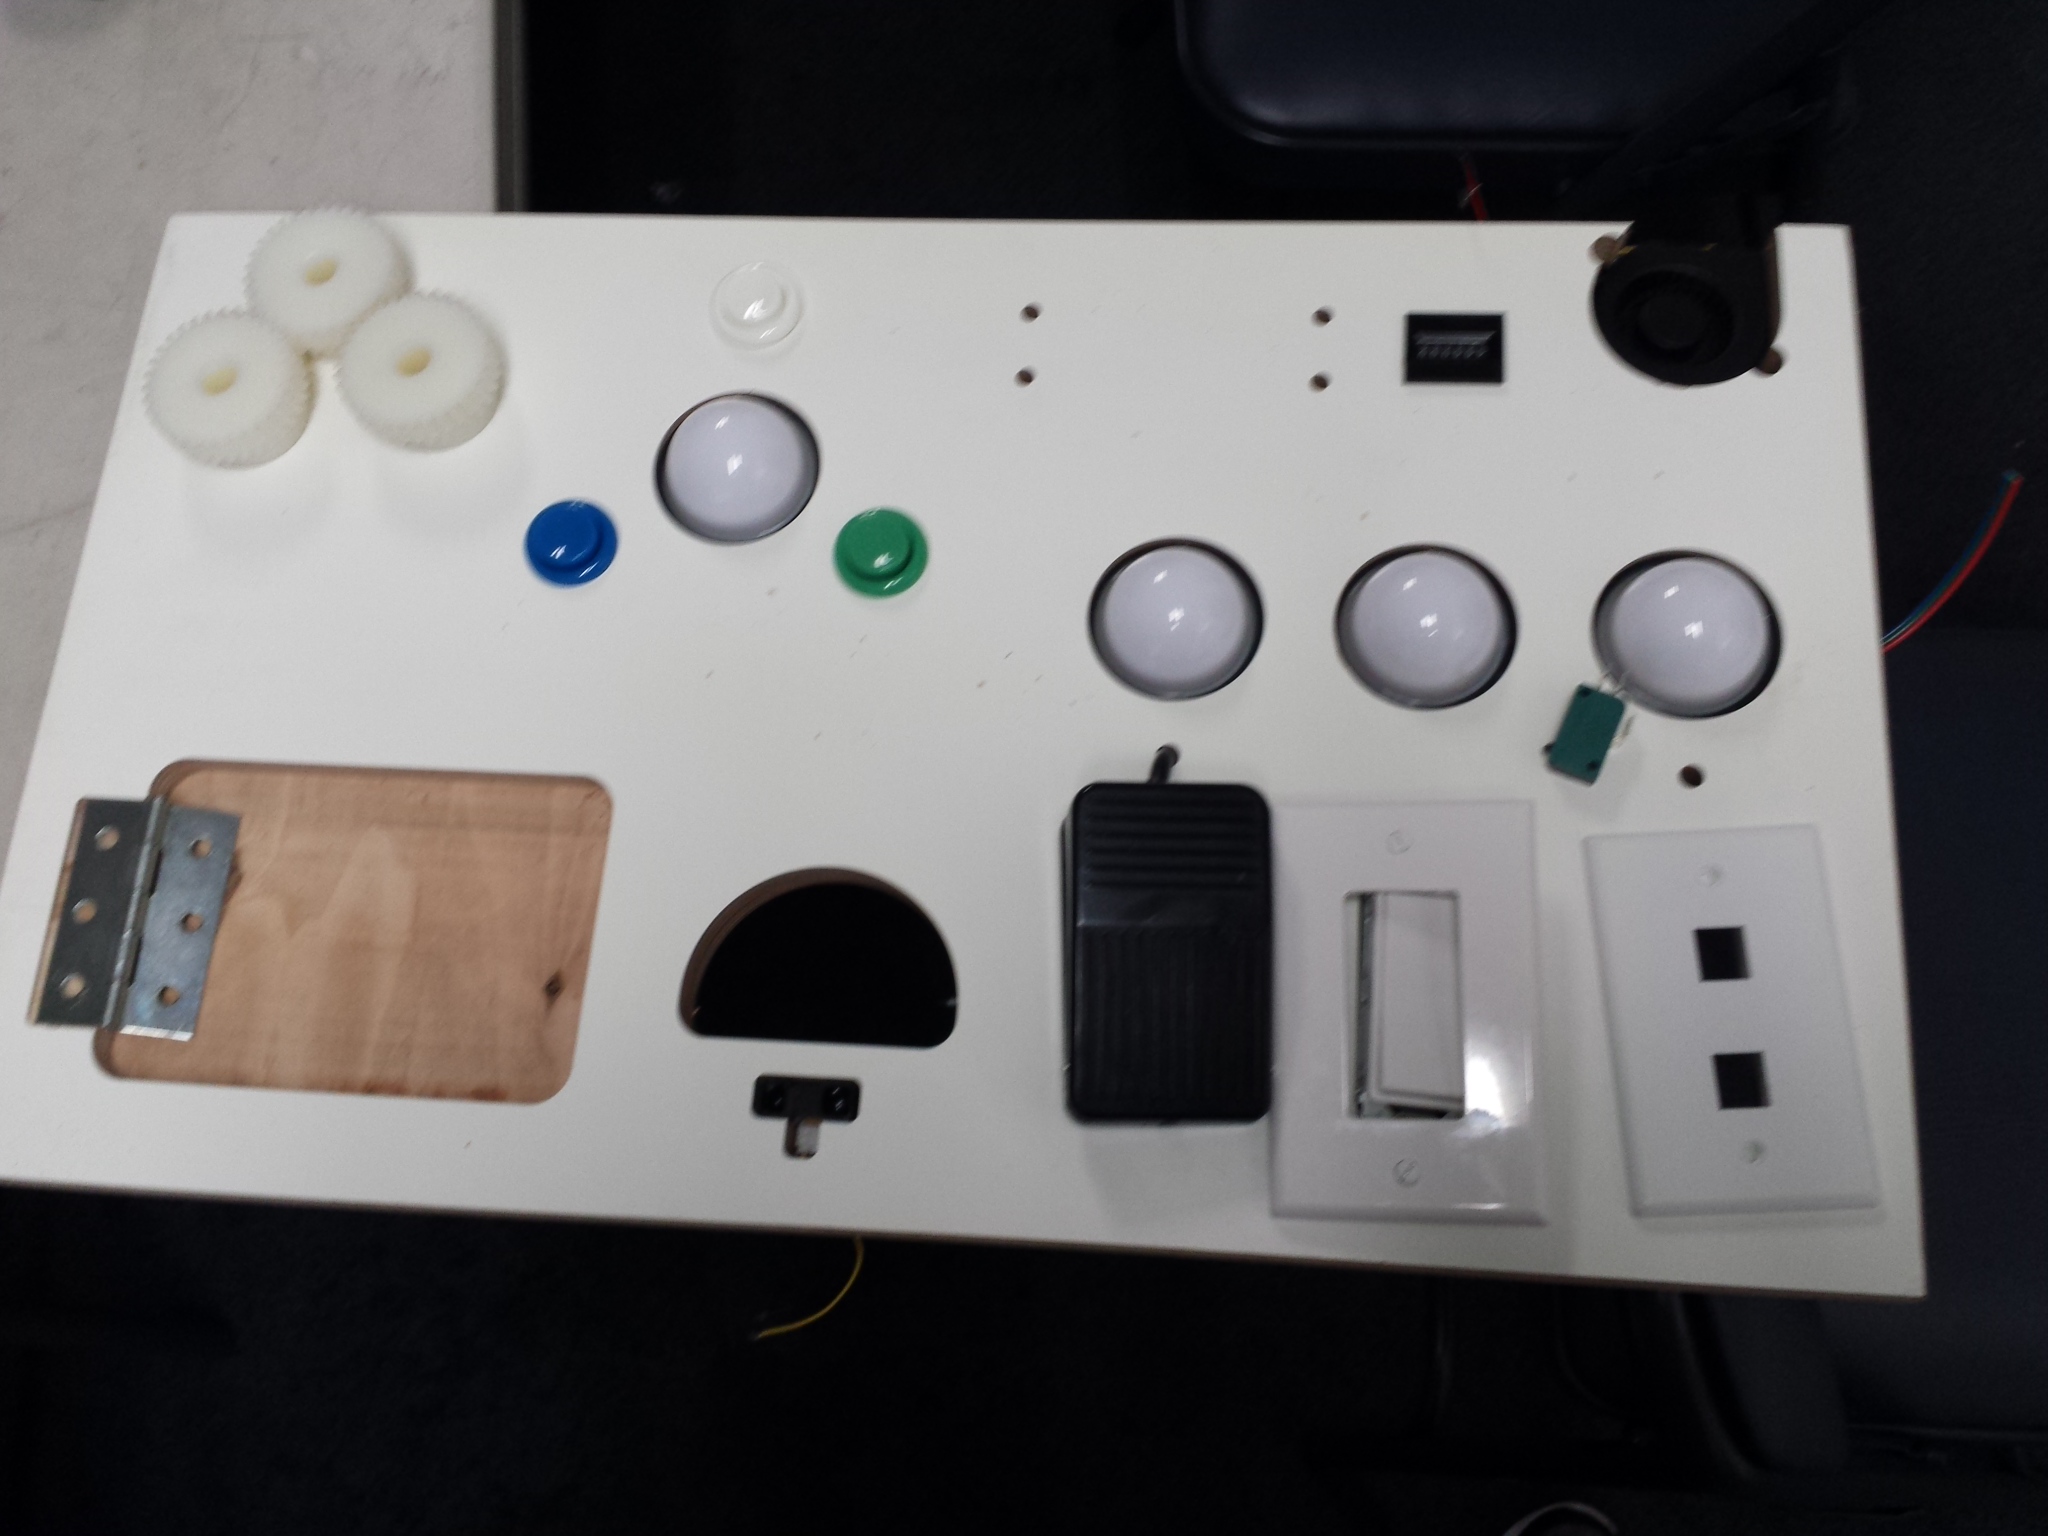
Final set of CNC cuts turned out pretty well. Now for printing the mounts for the break beam sensor.
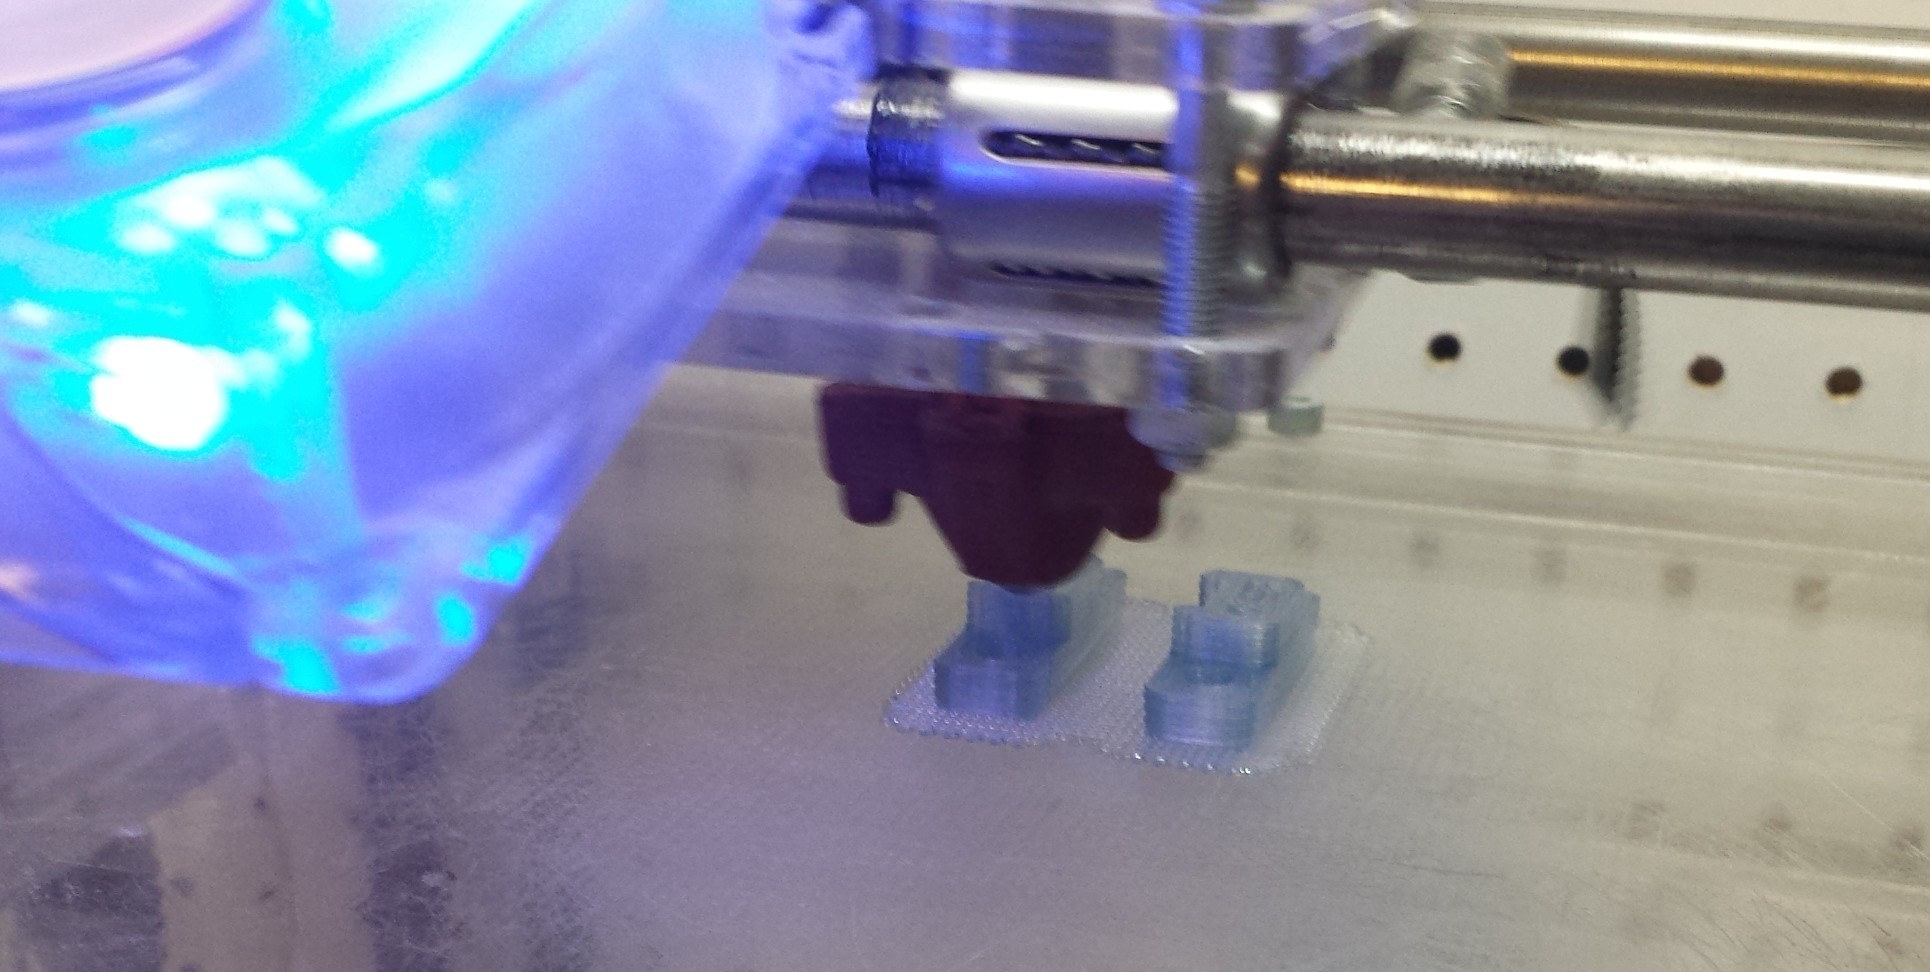
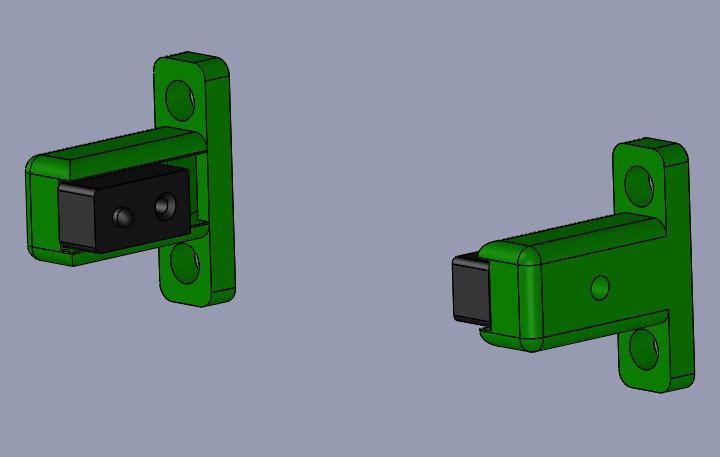
While that was printing, I laser cut the parts for the near far sensor.
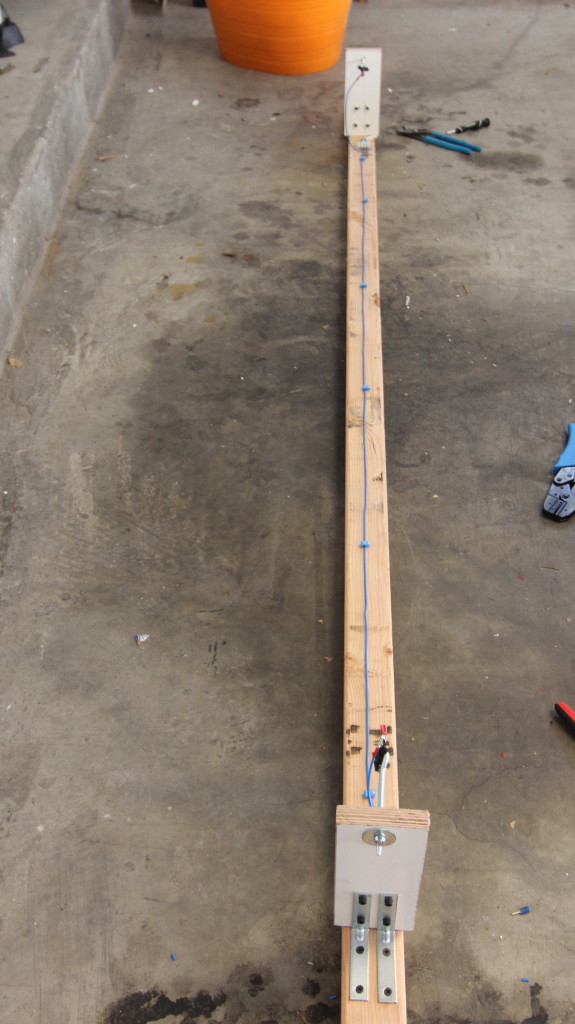
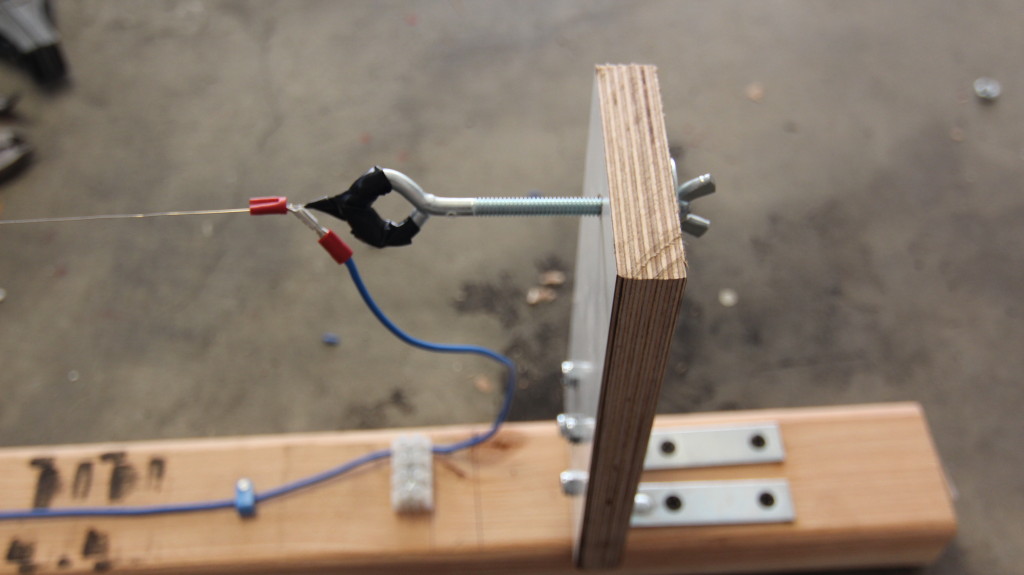
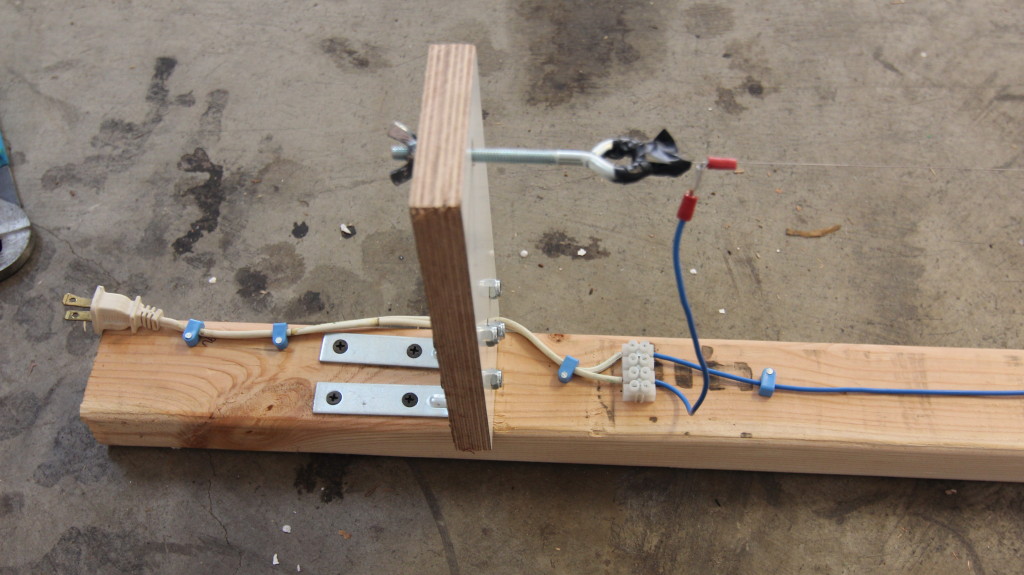
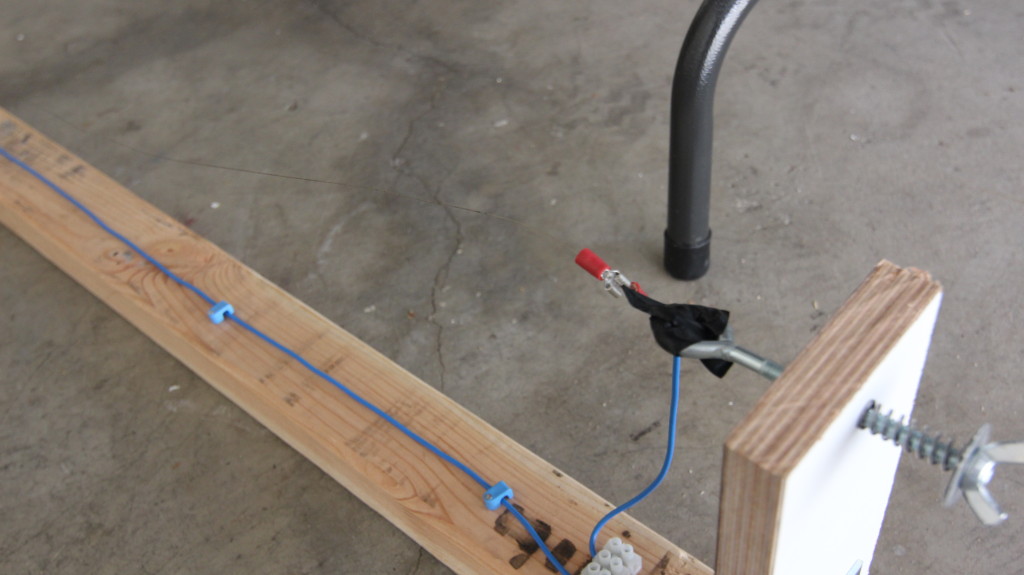
Next up, wiring.
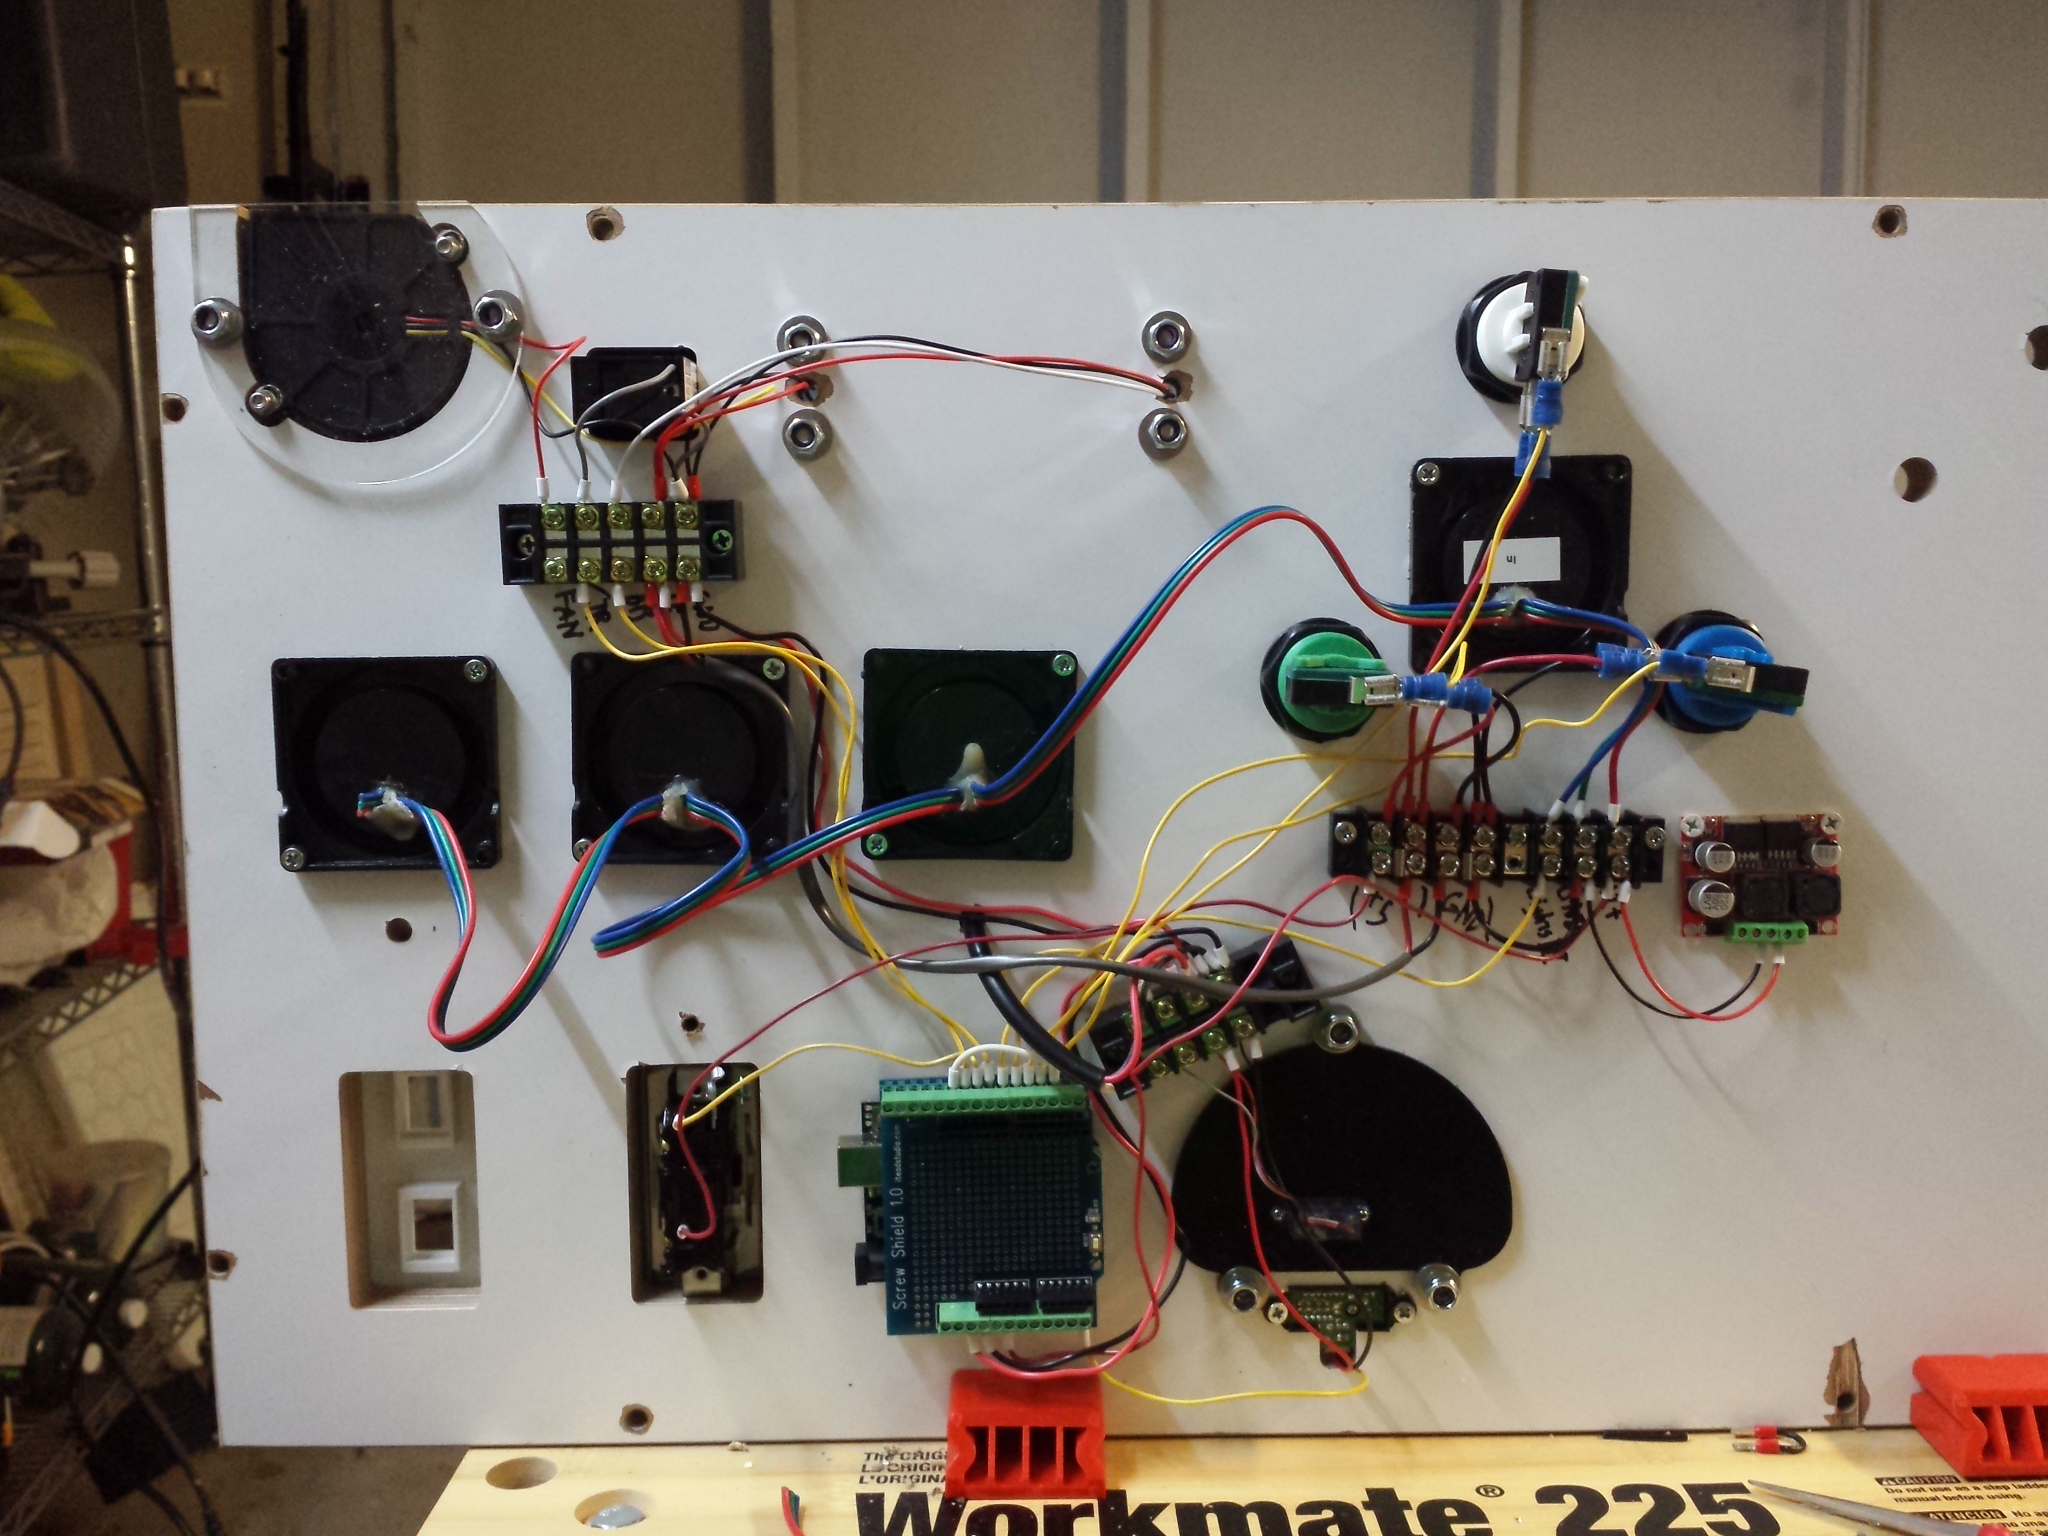
This is almost all the wiring. I forgot to take a clear picture before I sealed up the box.
Early test of the programming. I had to order a red button for the color wheel.
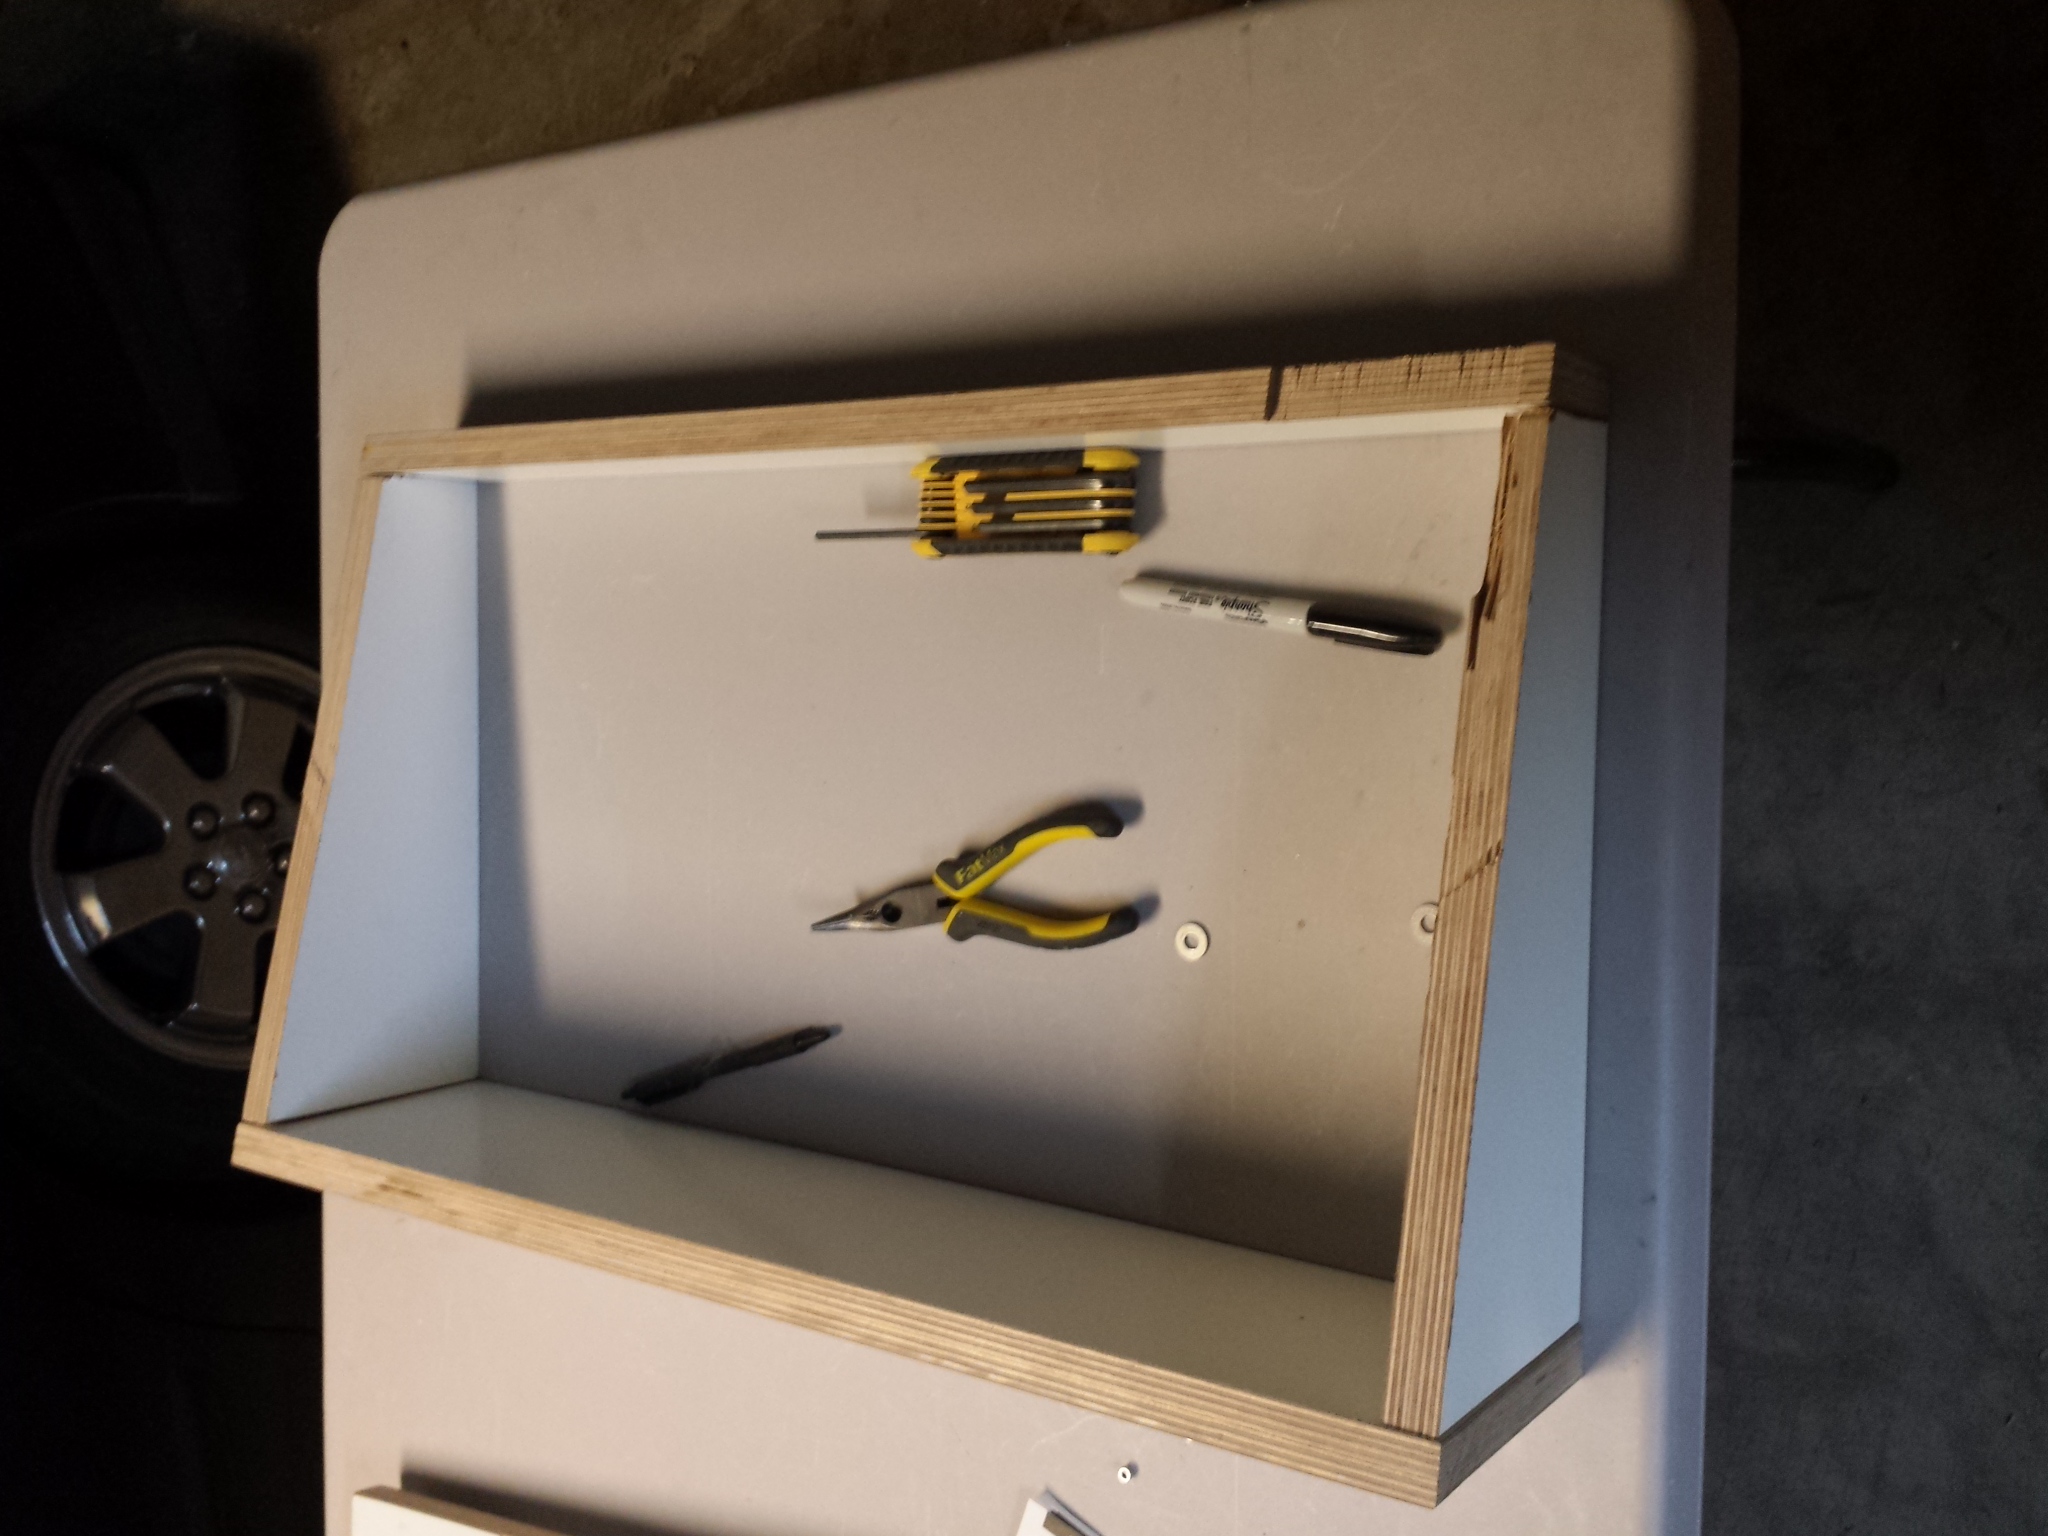
Built a box at 12 degree angle so she can use it standing up.
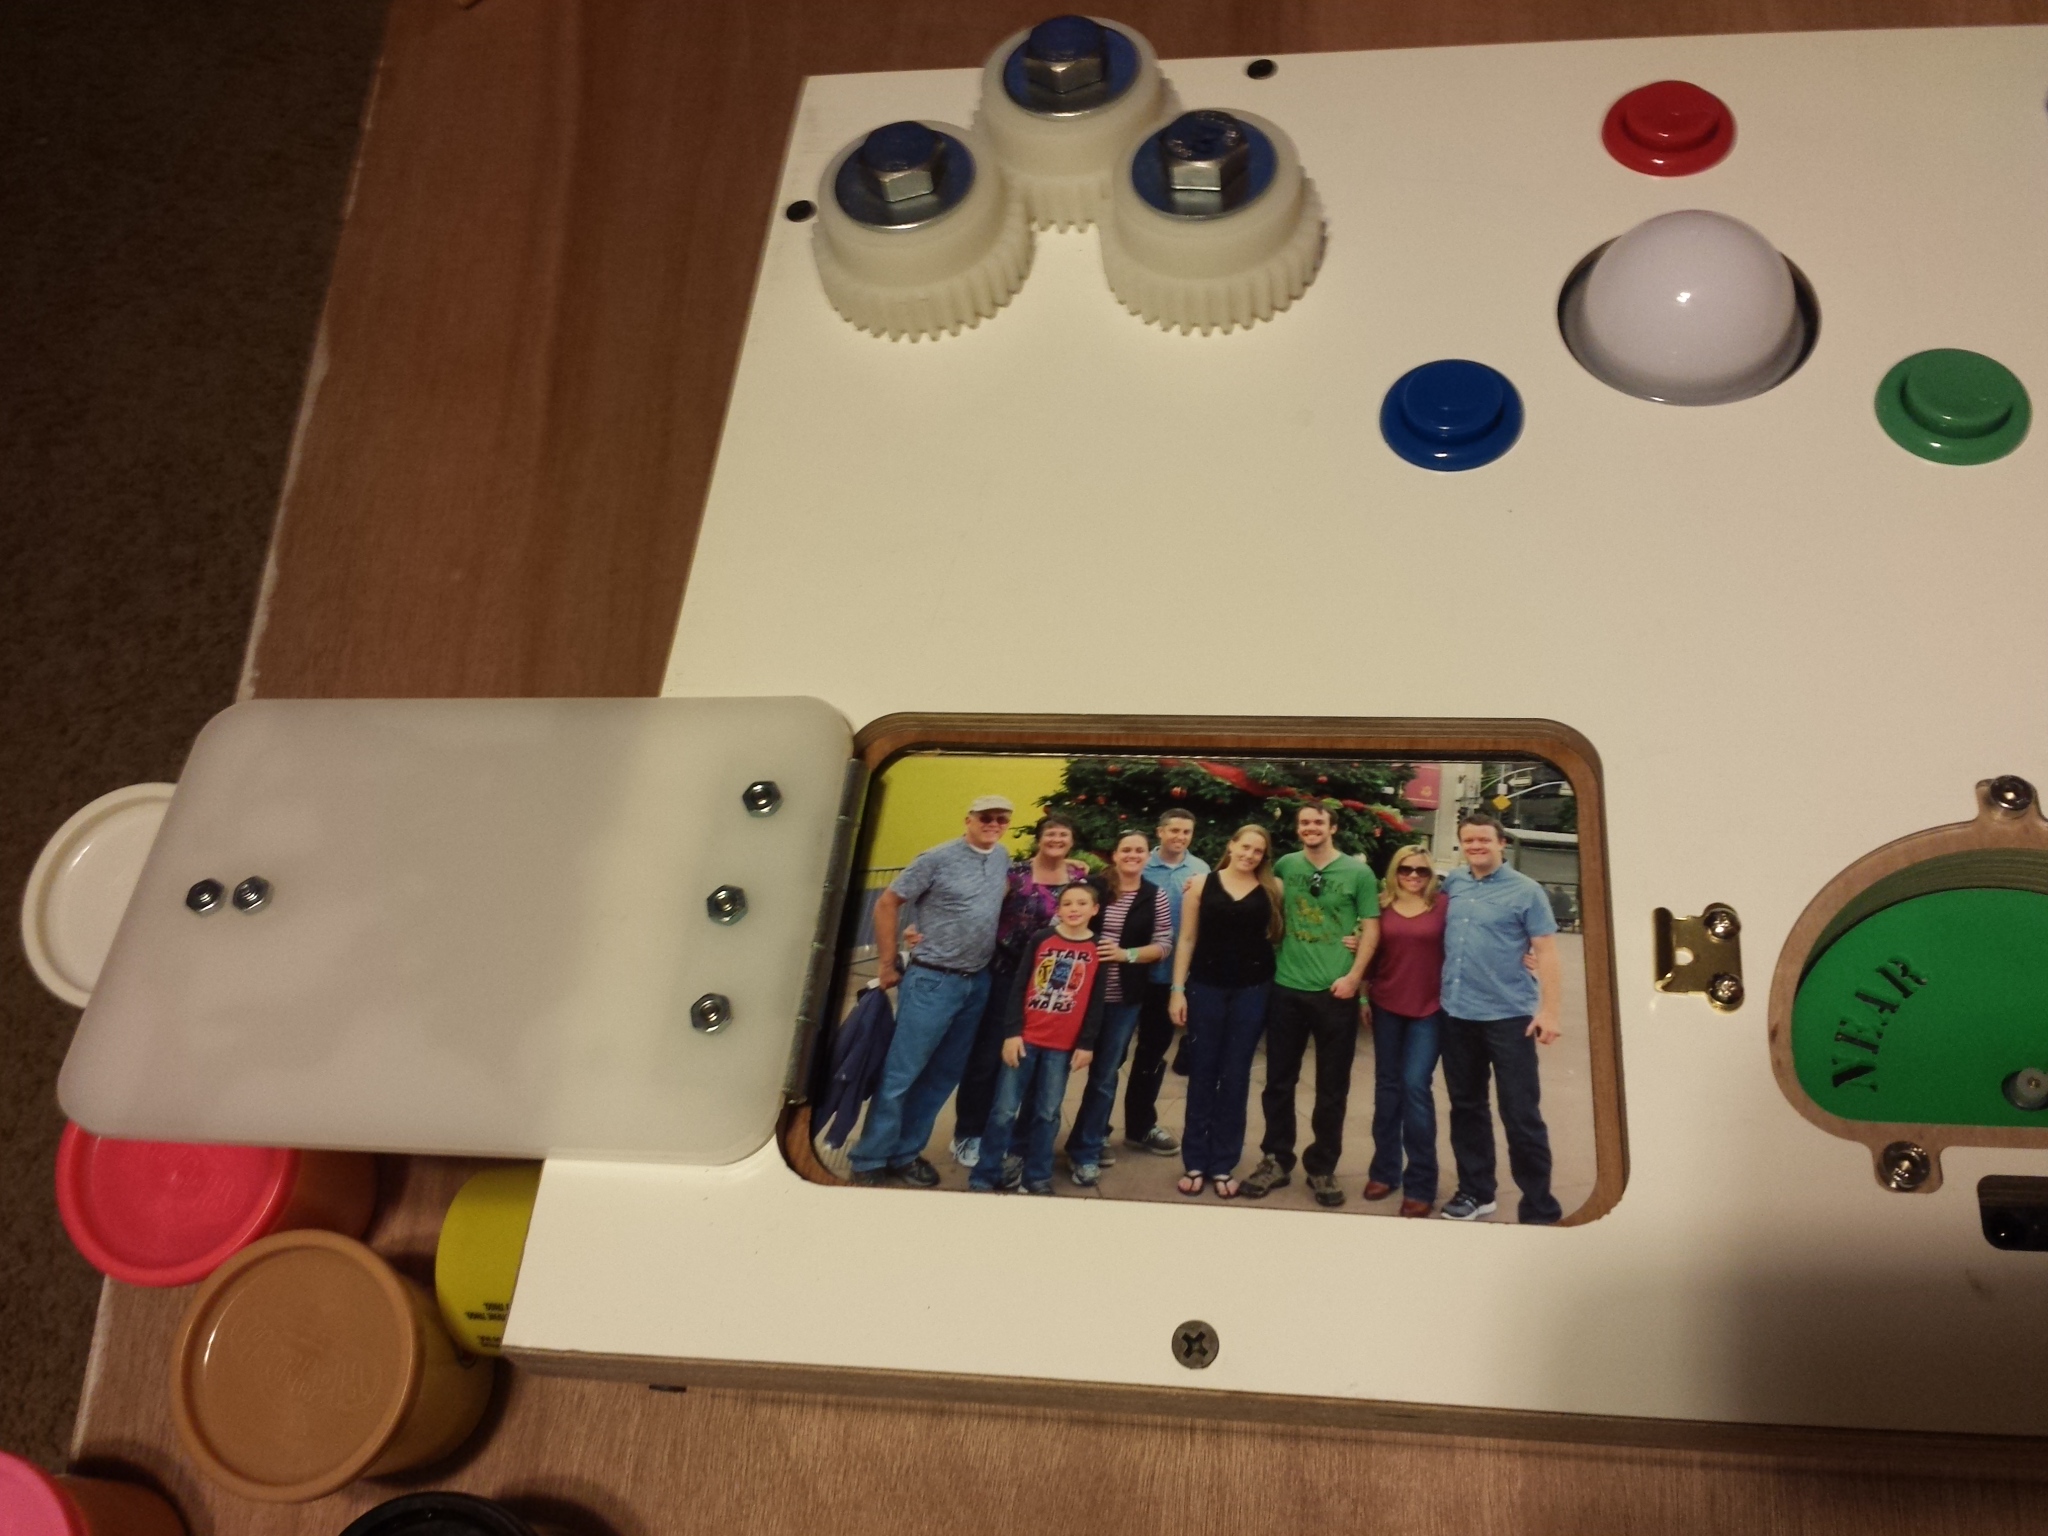
Picture of the family.
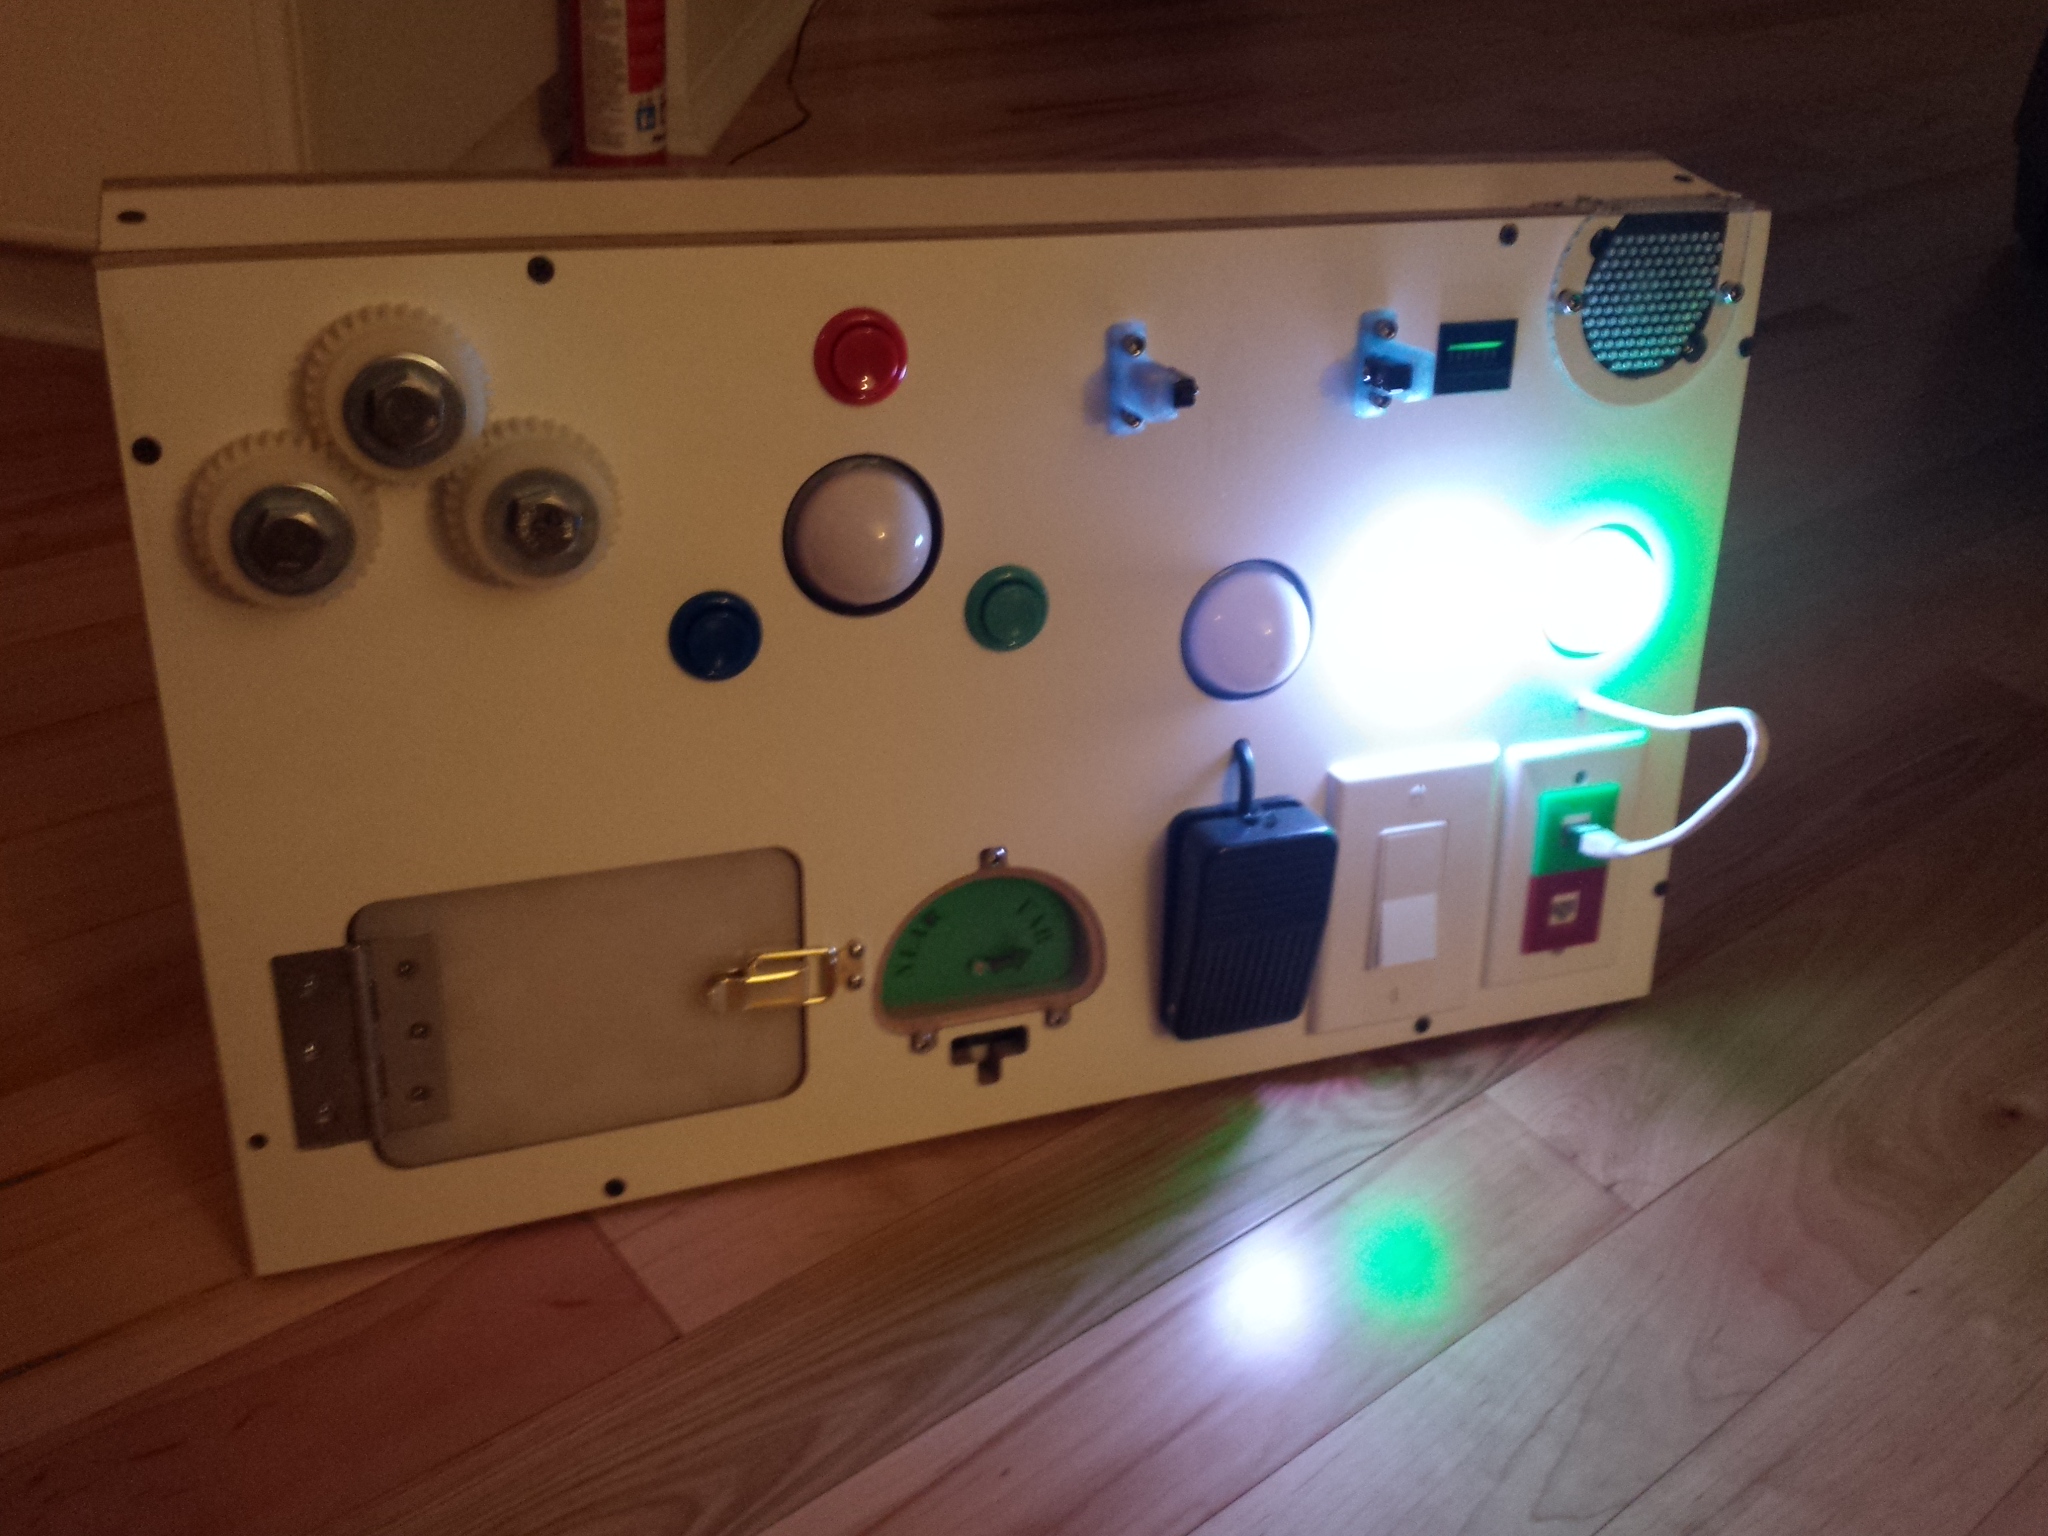
Complete!
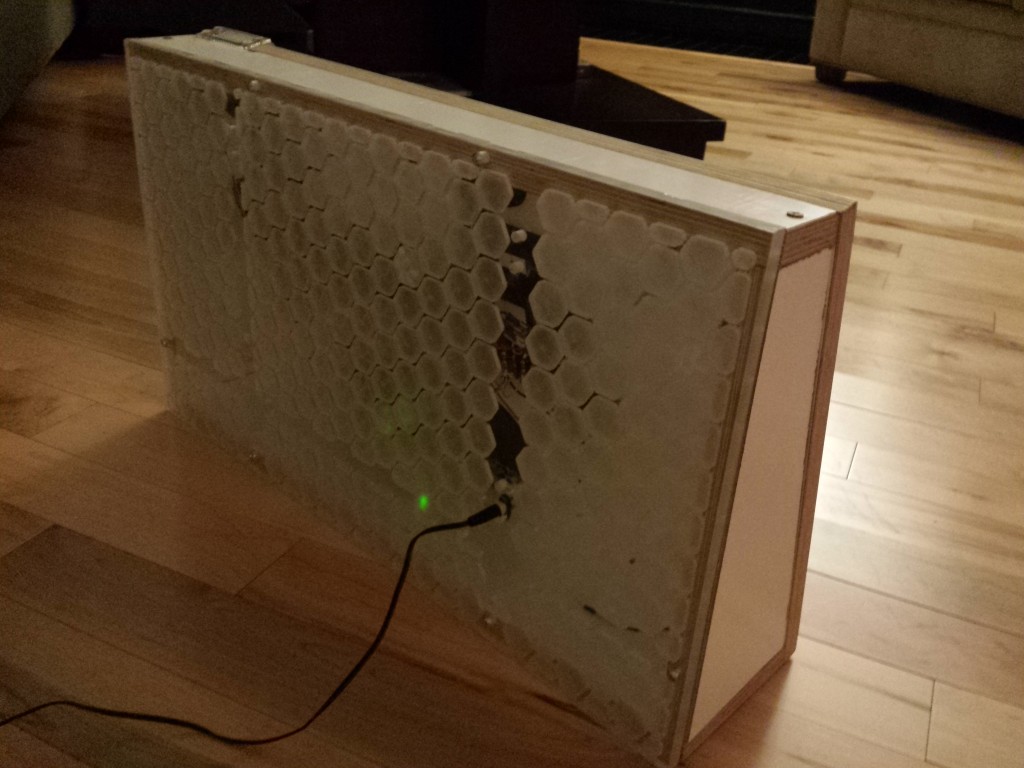
I used another piece of acrylic I had used for another project to seal up the back. The box is powered by a 12v DC adapter @ 1.0 amp.
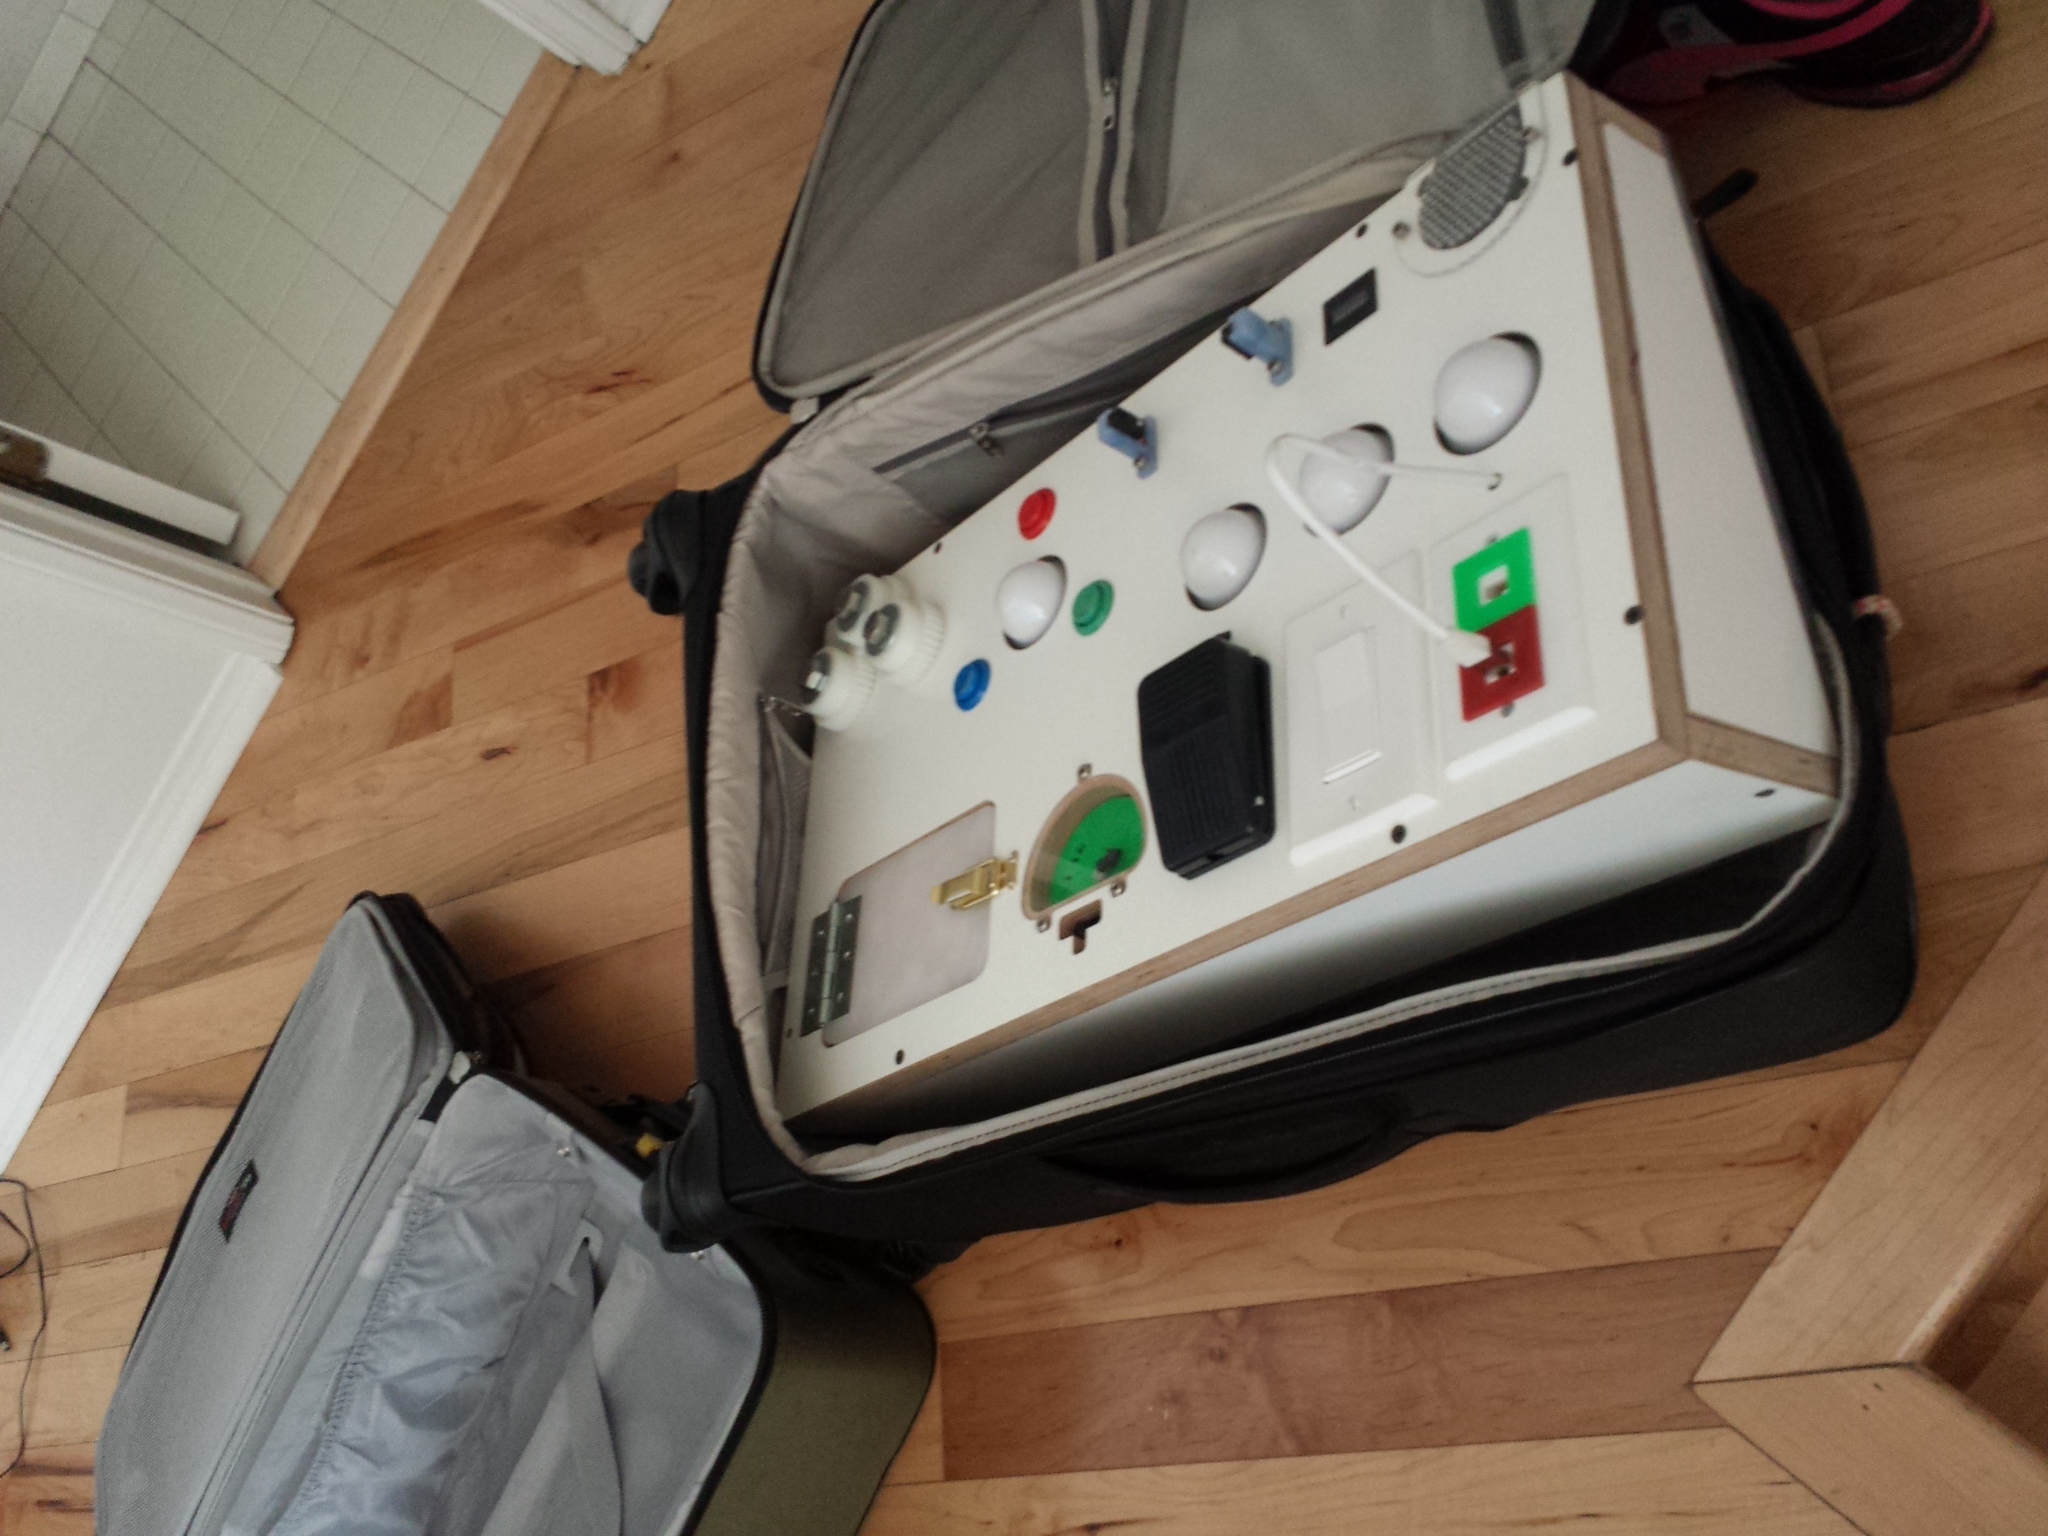
The O-shit moment, I had to get this on a plane and had not measured my suitcase. Luckily I had a bigger suitcase laying around.
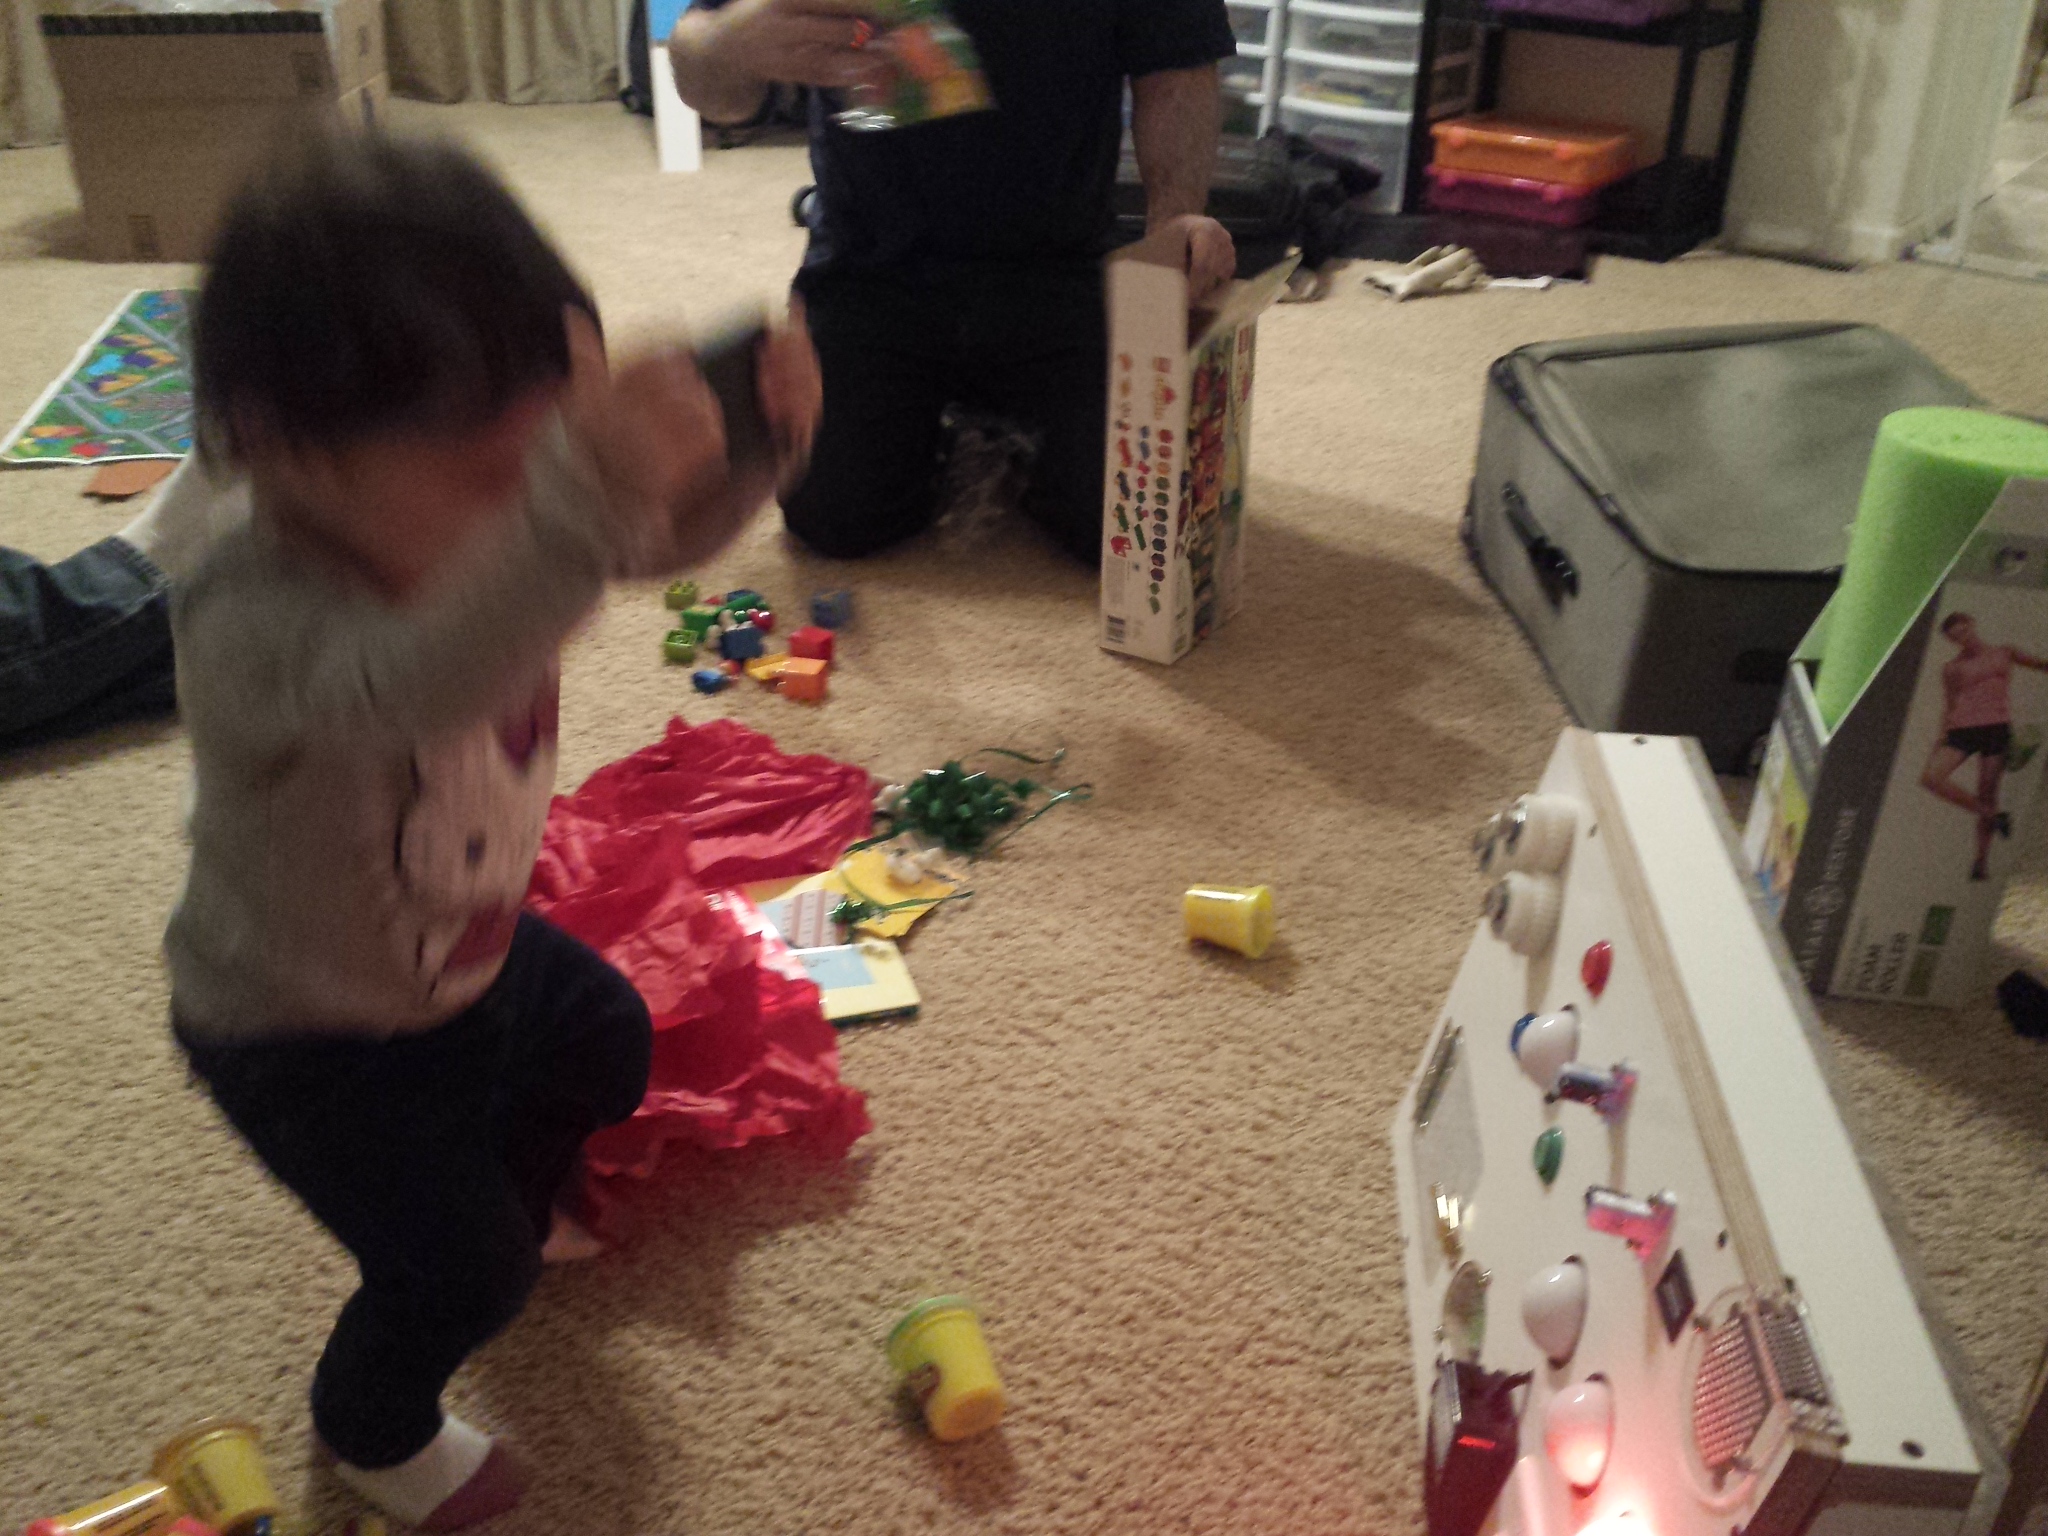
My niece loved it!
When she learned how to kick the foot pedal she was VERY excited.
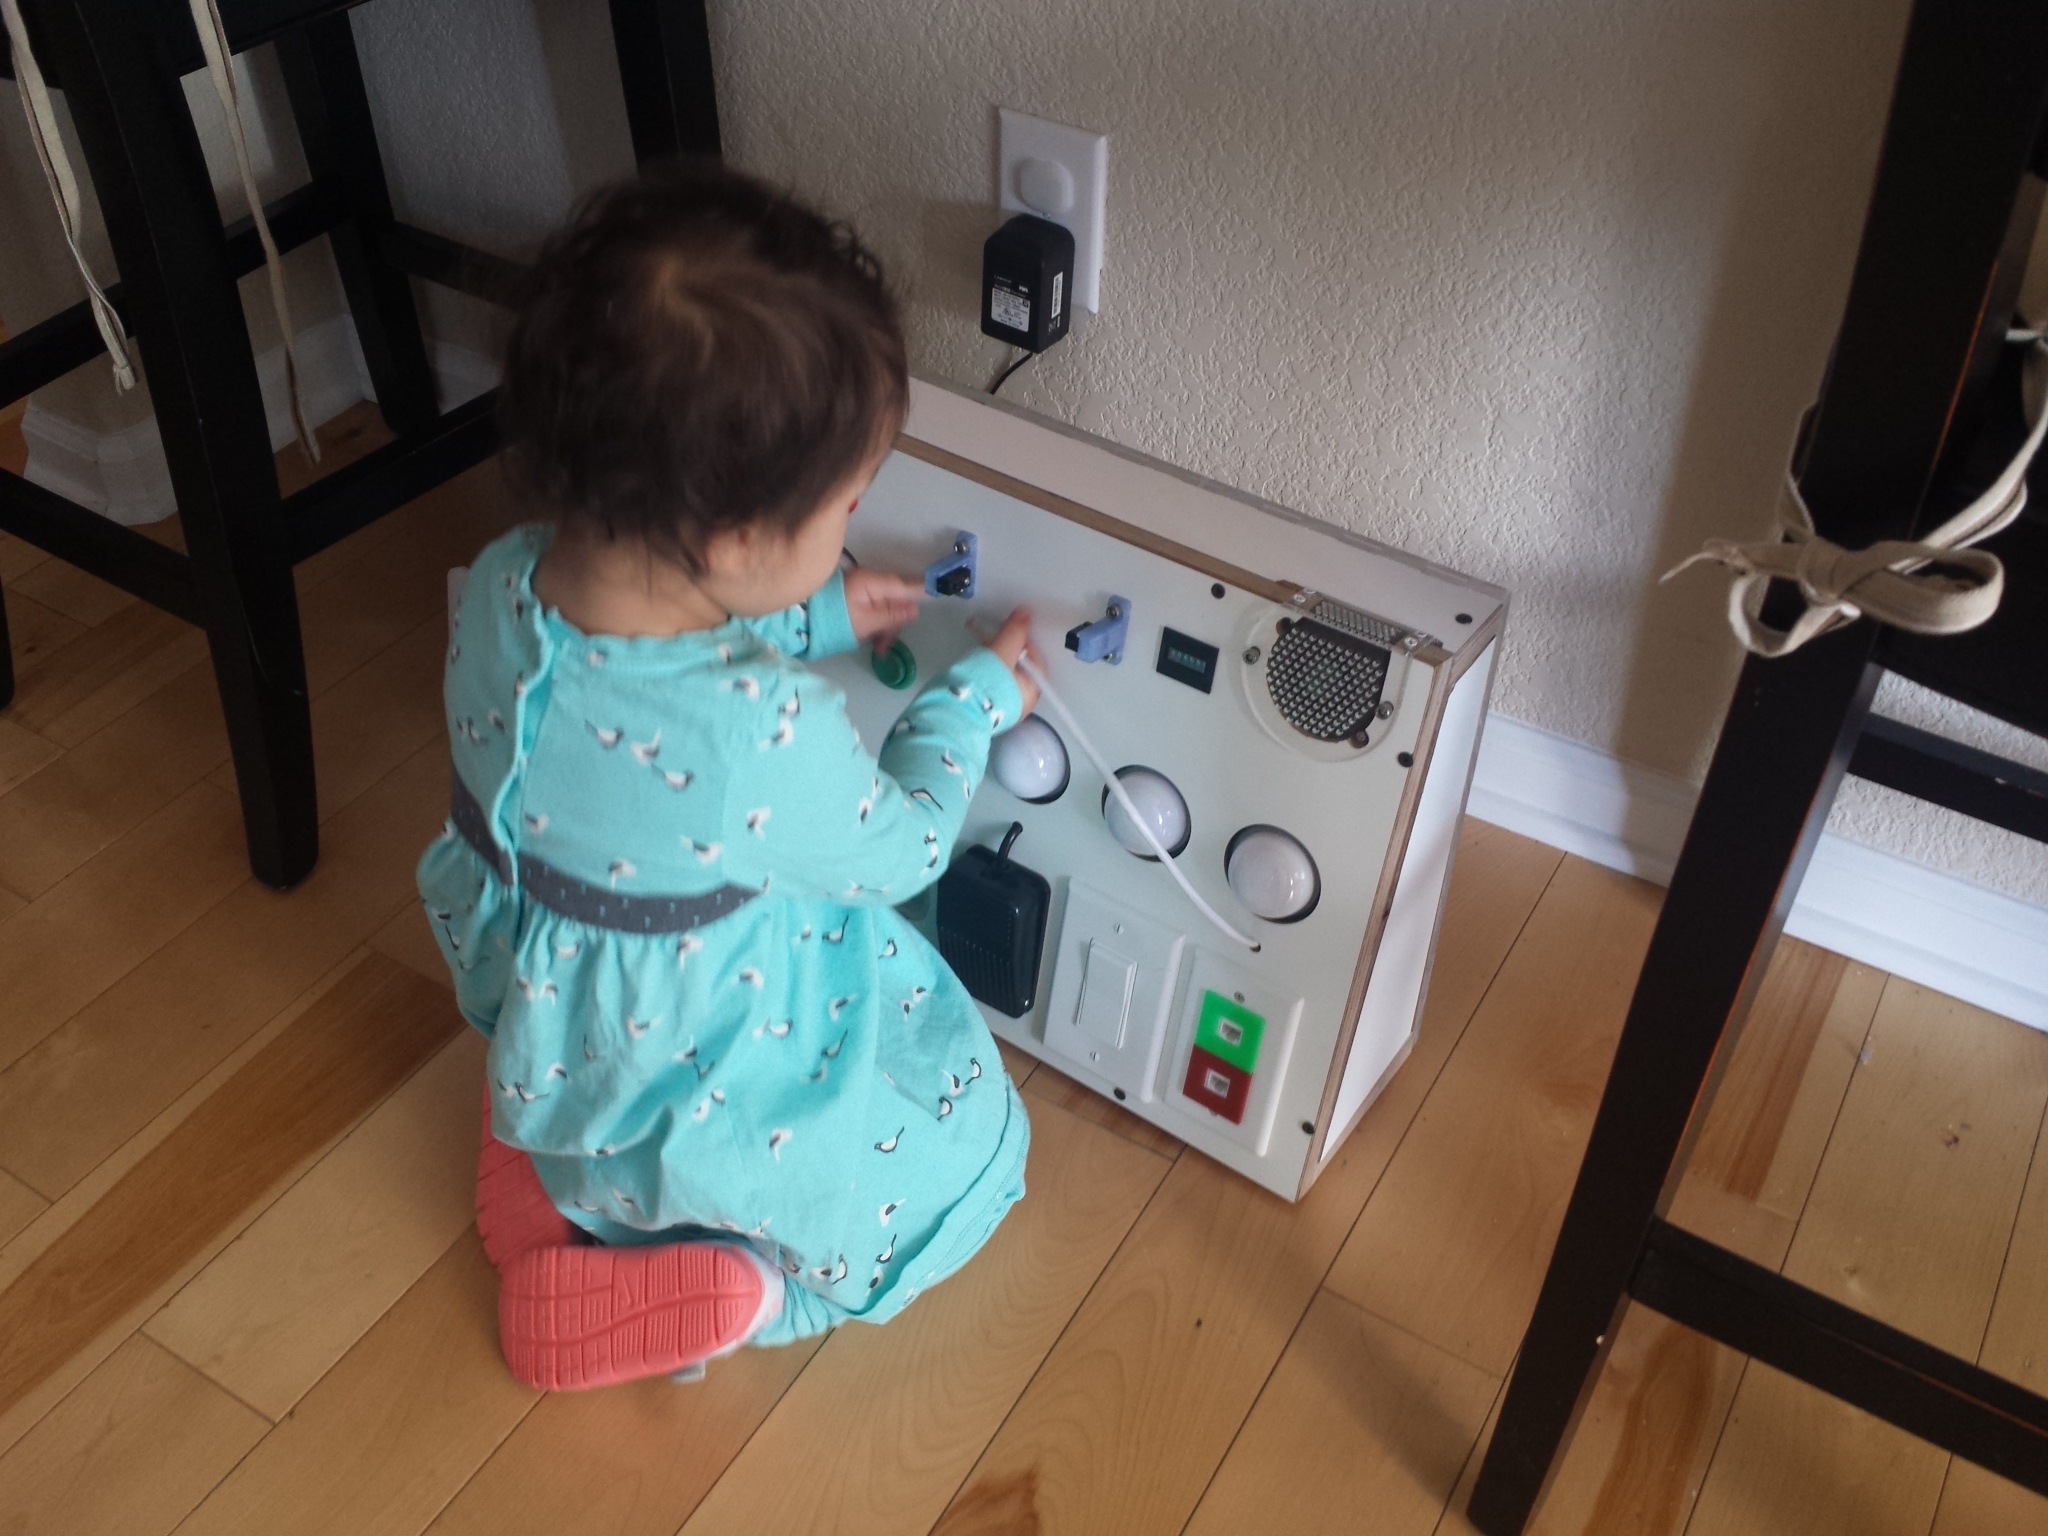
Might need to learn where to plug in the Ethernet cable.
Thanks for checking this out. I was inspired from the reddit post “My daughters’s activity wall” and thought I could make something like that!
Thanks again to Crashspace for helping me make this happen.
This project was completed in 11 days, from inception (Dec 8th) to delivery (Dec 18th) so a few corners were cut. I’d like to make it battery powered but that got nixed. I also realized I didn’t bring out the USB connection to re-program it so I would have to unscrew the back to do that. Overall, a huge success with the niece.
Edit: Thanks oomlout for the great write-up on your site!
Bill of materials:
Solidworks files
Arduino Sketch
Edit:
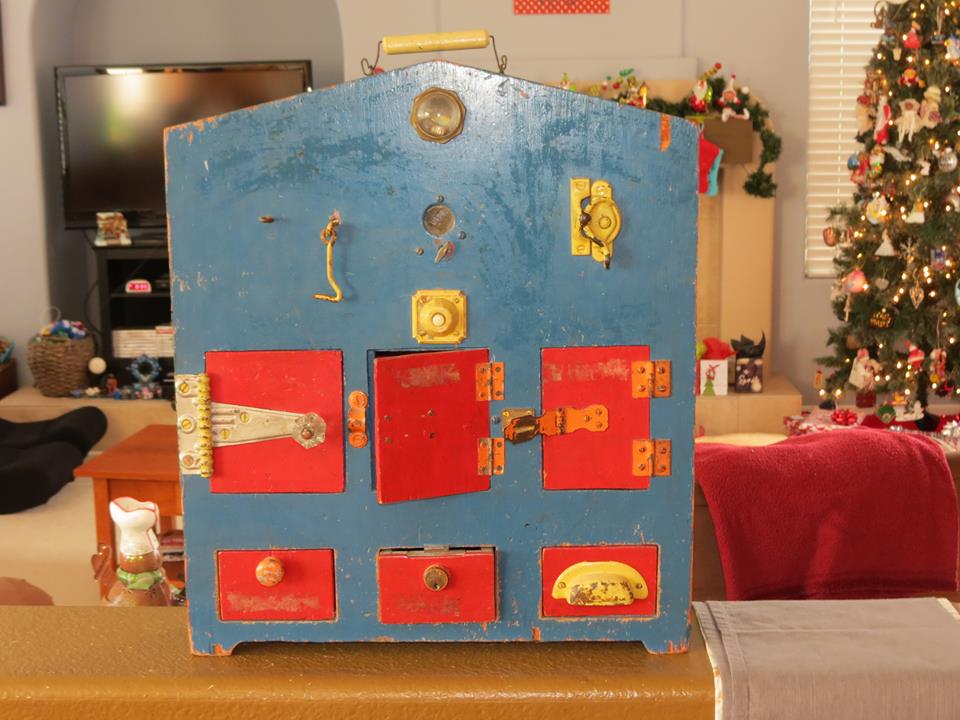
This is the original busy box my Great Grandfather made for my dad. We played with this thing for years as kids and my cousins still have it. Decent shape for being 55+ years old. It was the inspiration for my version of the activity board.