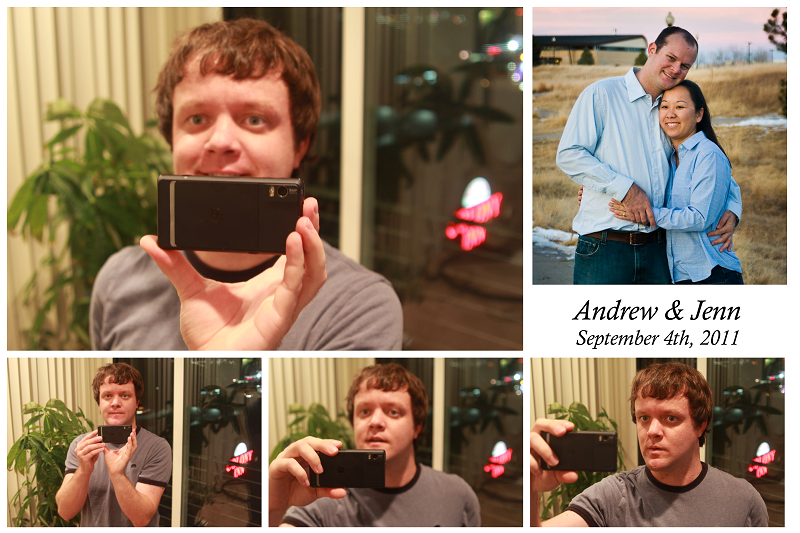
I made a photobooth for my brother’s wedding this next weekend.
Parts
- Arduino
- Canon T3i
- Staples easy button
- Mitsubishi CP-D70DW dye-sublimation printer
- EyeFi Pro SD Card
- 28-105mm lens
- Protoscrew shield for Arduino
- Cables
- Project box
- Velcro
The user walks up to the Easy button, presses it and the camera takes 4 pictures. Wirelessly, the EyeFi pro card transfers images over to the laptop and there is script running in the background to take the images in that directory and print them out with a wedding photo of Andrew and Jenn.
[youtube]http://www.youtube.com/watch?v=V8THhE5-xro[/youtube]

The whole thing takes about 1 minute and 30 seconds from press of the easy button to print out. The guests get to keep a cool souvenir, then Andrew and Jenn get to have the pictures afterward stored on the computer.
If you want to get more technical, the script running on the computer is a simple python script looking for 4 images. Hopefully, I’ll be able to just walk around the place, take 4 pictures, and have them automatically printed. We will see.
Edit:
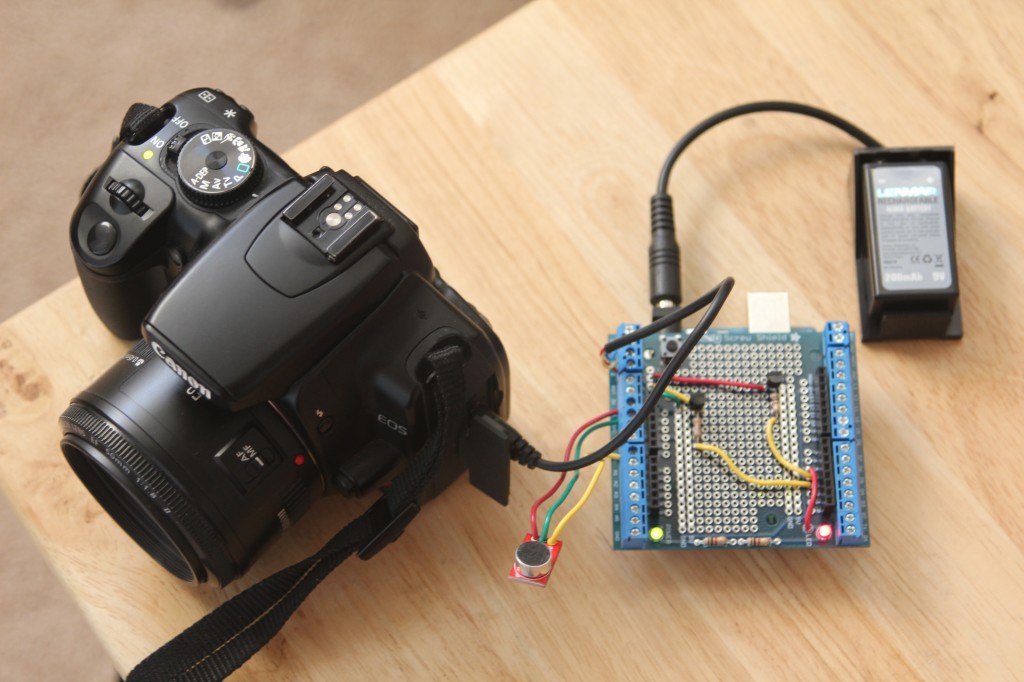
This is basically what is inside the box. Just replace the mic with the easy button. There are a couple of transistors and resistors connecting the wires to the 2.5mm Canon Rebel jack.

Edit 8-5-2013: I should have posted code long long ago. Here it is.

How did you get the arduino to control the camera?
I like your format in the final printed version. Too bad you couldn’t print out a long strip of film, but you made it even better including the wedding couple. Kudos!
Very cool project man, I’m loving it, really nice touch with the printout.
@Rick I wired in a couple transistors to the 2.5mm wire. When the camera is told to take a picture, it just connects 2 wires together.
The printer I have only does 4×6 prints, but I think its not a bug, more of a feature.
@epidemicz Thanks! I’m hoping it will be a hit at the wedding.
Brilliant idea, the easy button is a nice touch. Honest question, are you worried about people touching your gear/the safety of it throughout the reception?
Your Arduino case is really nice!
@Mary I’m not really worried. It is all friends and family in a secure location(hopefully). The easy button should make it clear to only press that one button and stay away from messing with the rest.
@Mo Zilla 10 minutes with a dremel and some velcro does wonders.
Pingback: Clever Wedding Photo Booth Made Using a Canon T3i
hey, i have a T3i also and im interested in a similar setup. do you think that you’d be able to send me the program code as well as arduino & staples button. i can paypal you some funds for the trouble. thanks! contact me on the email addr.
@John
If I have time in the future, I wouldn’t mind. Right now, I’m getting things ready for that wedding, and other jobs as well.
I’ll see if I can make a how-to sometime soon, complete with code, parts list and wiring diagrams.
Email me in a couple weeks and we’ll talk. (your email box is full right now and it bounced back to me.)
Sweet idea!
This would be slightly easier if you replaced the arduino and easy button with a standard remote trigger – they are dirt cheap for the knock off ones
What does the script do/what does it interface with to create the image for print?
@Karl I thought about just using a remote to start it, but went against it since I wanted something bigger and wired directly in. The box on the camera with the Arduino could be edited really easily, so I went with it since I didn’t exactly know where this would end up. I originally had it focus before taking the picture, but that didn’t work completely correctly on its own. The mirror would flip up 3x per shot. Basically, the Arduino gives me a lot of room for easy improvement.
The python script just looks in the directory for 4 jpg’s. If they are there, it uses PIL library to resize and place them on the image along with the stock image. Then I just use Windows’ print feature and like magic, it prints out. The combined image is also saved in the directory with a timestamp.
Hi Kevin
Great job on this setup, it made me want to build a booth of my own!
@Matthew Thanks! It was easier to build than you may think. Definitely a fun project. Good luck with your booth!
What a great idea! Put’s a new spin on “That was easy!”
Pingback: File under “projects we should do” | Miscellaneous Heathen
Such a great idea! Are the details available? Would love to try. Thanks.
Thanks Jennifer! It was a fun project. I don’t have the code up for download as I no longer have a printer to test it with. Not sure when I’ll be able to clean it up enough for public use.
Very cool! Your work on this actually served as a jumping off point for a booth I am building. Check it out if you have a chance.
This is so great. How did it go at your brothers wedding? Anything you may have done different? I am trying to build one for my wedding. Its my first Arduino project so I am planning to keep it simple and just have a easy button trigger a mac to use a webcam and the photobooth software…. but I would rather use my canon dslr if i can. Do you have a code for this set up? or even a code that uploads to tumblr instead of printing off the picture?
Hi Kevin! This is so cool! My cousin is getting married and I would like to do the same. Would it be okay to email me the code? This would be my gift for my cousin.
Could you share the script?
I have mine all set with the arduino but have no idea about the script.
Thanks in advance.
You need to make a tutorial on how to set this up step by step with the wiring and coding. This is awesome.
Can you email me the code? Thanks
Very cool! Did you find time to do a schematic for the necessary wiring? Would love to try it.
Kevin,
What a great project. You’ve inspired me to do my own. I see your code posted with the Python script, but I don’t see any Arduino source code. Can you provide? Thanks!
Hi Kevin,
I am putting together an exhibit at the Cal Auto Museum in Sacramento, CA, and am looking to do an automated “videobooth” for the exhibit to be interactive. I am been asking around to local game designers and univeristies, to no luck. I am VERY short on time, but still need this to be created. I have a small stipend and the money for compenents. I found you in my desperate google search to see if I could build it myself (doubtful). I do not know where you are located, but if you are interested in this project, or know someone who would be, please get in touch with me at the Museum. Our website with complete contact info is http://www.calautomuseum.org.
Thanks,
Carly